In the previous tutorial, we added support for the basic creation and editing of geographical features. This tutorial will take the concept a step further and add support for tactical symbols. If you didn’t follow along with the previous tutorials in this series, please complete those first.
- Creating a basic WPF Client with MVVM
- Adding feature editing tools to the WPF client application
We will start this article by building up a new menu where a hierarchical list of tactical symbol metadata will be visualized for selection. We will then add options for specifying the affiliation when creating symbols. Finally, we will extend the MapViewModel to handle adding and editing symbols.
This archive contains the solution outlined in this article.
Prerequisites
You will need a license to use Tactical Extension in order to be able to follow along with this tutorial.
Carmenta Engine Tactical Extension
With the Tactical Extension for Carmenta Engine, one can access a set of components that can be used to create and manage tactical overlays for a map. The supported standards in Carmenta Engine are the MIL-STD standards specified by the US Department of Defense:
- MIL-STD-2525B
- MIL-STD-2525C
- MIL-STD-2525D
As well as the NATO APP-6 standards:
- App-6(B)
- App-6(C)
- App-6(D)
There are some things to take into consideration when using the different standards in Carmenta Engine, so please see the documentation for the details.
In this article, we will be working with the MIL-STD-2525D standard.
Creating the View and ViewModels
We will start by creating the View and ViewModel for managing tactical symbols. Start by creating a ViewModel class in ViewModels\TacticalSymbolsMenuViewModel.cs. We will create a private field containing information about a symbol standard by using the SymbolStandard class in Carmenta Engine. On the SymbolStandard class we can access properties for specific standards, in this case we will use the SymbolStandard.MilStd2525D property:
using Carmenta.Engine;

using CarmentaWpfClient.Messages;

using CommunityToolkit.Mvvm.ComponentModel;
using CommunityToolkit.Mvvm.Input;
using CommunityToolkit.Mvvm.Messaging;

using System.Collections.Generic;
using System.Windows;

namespace CarmentaWpfClient.ViewModels
{
    public partial class TacticalSymbolsMenuViewModel : ObservableObject
    {
        private readonly SymbolStandard _symbolStandard = SymbolStandard.MilStd2525D;
        private SymbolMetadata? _currentSymbolMetadata;
        private string _affiliation = "Friend";

        public IEnumerable<SymbolMetadata> Symbols => _symbolStandard.Metadata.ChildSymbols;

        public string Affiliation
        {
            get => _affiliation; set
            {
                _affiliation = value;

                SendUpdateMessage();
            }
        }

        [RelayCommand]
        public void SelectionChanged(RoutedPropertyChangedEventArgs<object>? args)
        {
            if (args?.NewValue is not SymbolMetadata symbolMetadata)
                return;

            _currentSymbolMetadata = symbolMetadata;

            SendUpdateMessage();
        }

        private void SendUpdateMessage()
        {
            if (_currentSymbolMetadata is not null)
                WeakReferenceMessenger.Default.Send(new SymbolSelectedMessage(_currentSymbolMetadata, Affiliation));
        }
    }
}
We’ve also created a command that will be used for handling selections in the view and an Affiliation property that will be used for handling setting the affiliation of created symbols. The SendUpdateMessage method will send a message to signal that a new symbol or affiliation has been selected.
Message for when a tactical symbol is selected
Create SymbolSelectedMessage in Messages\SymbolSelectedMessage.cs:
Messages\SymbolSelectedMessage.cs
using Carmenta.Engine;

namespace CarmentaWpfClient.Messages;

public record SymbolSelectedMessage(SymbolMetadata SymbolMetadata, string Affiliation);
It’s a simple record containing the SymbolMetadata and a string representation of the affiliation for the current symbol.
Creating the View
<UserControl x:Class="CarmentaWpfClient.Views.TacticalSymbolsMenuView"
             xmlns="http://schemas.microsoft.com/winfx/2006/xaml/presentation"
             xmlns:x="http://schemas.microsoft.com/winfx/2006/xaml"
             xmlns:mc="http://schemas.openxmlformats.org/markup-compatibility/2006"
             xmlns:d="http://schemas.microsoft.com/expression/blend/2008"
             xmlns:b="http://schemas.microsoft.com/xaml/behaviors"
             xmlns:controls="clr-namespace:ModernWpf.Controls;assembly=ModernWpf.Controls"
             xmlns:system="clr-namespace:System;assembly=netstandard"
             mc:Ignorable="d"
             d:DesignHeight="450" d:DesignWidth="800">
    <ScrollViewer>
        <StackPanel>
            <Border Background="{DynamicResource SystemControlDisabledListMediumBrush}" Margin="5" Padding="5">
                <StackPanel >
                    <controls:RadioButtons SelectedItem="{Binding Affiliation, Mode=TwoWay}">
                        <system:String>Friend</system:String>
                        <system:String>Neutral</system:String>
                        <system:String>Hostile</system:String>
                        <system:String>Unknown</system:String>
                    </controls:RadioButtons>
                </StackPanel>
            </Border>
            <TreeView ItemsSource="{Binding Symbols}">
                <b:Interaction.Triggers>
                    <b:EventTrigger EventName="SelectedItemChanged">
                        <b:InvokeCommandAction Command="{Binding SelectionChangedCommand}" PassEventArgsToCommand="True" />
                    </b:EventTrigger>
                </b:Interaction.Triggers>
                <TreeView.ItemTemplate >
                    <HierarchicalDataTemplate ItemsSource="{Binding ChildSymbols}">
                        <TextBlock Text="{Binding Description}" />
                    </HierarchicalDataTemplate>
                </TreeView.ItemTemplate>
            </TreeView>
        </StackPanel>
    </ScrollViewer>
</UserControl>
The view specifies a group of mutually exclusive radio buttons for setting the affiliation of the symbols. These bind the SelectedItem property to the Affiliation property on the ViewModel. The TreeView component to the Symbols property on the ViewModel and the HierarchicalDataTemplate will build up the nested, tree-like structure of the symbols for the MIL-STD-2525D standard. The data template binds to the ChildSymbols property which exists on the SymbolMetadata class, and the Description is displayed in the tree view for each symbol.
Injecting the tactical symbols view model
With the View and ViewModel created, let’s add them to the application. Start by registering the TacticalSymbolsMenuViewModel as a service in App.ConfigureServices by editing App.xaml.cs:
App.xaml.cs
...
namespace CarmentaWpfClient
{
    /// <summary>
    /// Interaction logic for App.xaml
    /// </summary>
    public partial class App : Application
    {
        ...

        private static IServiceProvider ConfigureServices()
        {
            var services = new ServiceCollection();
            ...
            services.AddTransient<TacticalSymbolsMenuViewModel>();

            return services.BuildServiceProvider();
        }
    }
}
Then make sure to inject it into DrawerMenuViewModel and add a new case in the switch expression in DrawerMenuViewModel.SelectionChanged:
...
namespace CarmentaDemoWPF.ViewModels
{
    public partial class DrawerMenuViewModel(
    ... ,
    TacticalSymbolsMenuViewModel _tacticalSymbolsMenuViewModel) : ObservableObject
    {
        ...

        private void SelectionChanged(SelectionChangedEventArgs? e)
        {
            ...

            if (e.AddedItems[0] is ListBoxItem listBoxItem)
            {
                var tag = listBoxItem.Tag.ToString();

                CurrentViewModel = tag switch
                {
                    ...
                    "tactical" => _tacticalSymbolsMenuViewModel,
                    _ => null
                };
            }
        }
    }
}
Adding the tactical symbols view to the app
With the new view model in place we have to add the view to DrawerMenuView.xaml by adding a new data template linking the TacticalSymbolsMenuViewModel to the TacticalSymbolsMenuView:
<UserControl ...>
    <UserControl.Resources>
        ...
        <DataTemplate DataType="{x:Type vm:TacticalSymbolsMenuViewModel}" >
            <local:TacticalSymbolsMenuView />
        </DataTemplate>
        ...
    </UserControl.Resources>

    <Grid Background="{StaticResource SystemAccentColorDark1Brush}">
        ...
        <Grid Grid.Column="0">
            ...
            <ListBox Grid.Row="1" Visibility="{Binding IsOpen, Converter={StaticResource BooleanToVisibilityConverter}}" SelectionMode="Extended">
                ...
                <ListBoxItem Tag="tactical">
                    Tactical
                </ListBoxItem>
            </ListBox>
        </Grid>
        ...
    </Grid>
</UserControl>
We have also added another entry, tactical, in the drop down list of tool modes.
Tactical symbols in the map
Map Configuration
With most of the application code in place to select tactical symbols, we now have to extend our map configuration and MapViewModel to support tactical symbols as well.
We will edit the map configuration world_map.px by adding a new OrdinaryLayer towards the bottom and call it TacticalSymbolsLayer. Make the OrdinaryLayer selectable.
To the OrdinaryLayer we will add a VisualizationOperator with two TacticalVisualizer objects, one in the VisualizationOperator‘s SelectionVisualizers and one in Visualizers. The TacticalVisualizer will require a Parameter value, so add a reference to a MilStd2525DParameters to both TacticalVisualizers.
Finally, add to the VisualizationOperator a ReadOperator with a MemoryDataSet called TacticalSymbolsDataSet. The end result should look like this:

Changing the MapViewModel
Last step is to retrieve the MemoryDataSet for tactical symbols in the MapViewModel and use that to instantiate a new CreateTool. We also have to register the MapViewModel as a recipient for the newly created SymbolSelectedMessage so that we can change the current tool to a tool for editing tactical symbols.
ViewModels\MapViewModel.cs
...
namespace CarmentaDemoWPF.ViewModels
{
    public class MapViewModel : ObservableObject,
        IRecipient<UpdateViewMessage>,
        IRecipient<ChangeToolMessage>,
        IRecipient<SymbolSelectedMessage>
    {
        ...
        private CreateTool? _tacticalCreateTool;
        ...
        public MapViewModel(View view)
        {
            ...

            var tacticalSymbolsDataSet = CurrentMap.View
                .GetTypedObject<MemoryDataSet>("TacticalSymbolsDataSet");

            if (tacticalSymbolsDataSet is not null)
                _tacticalCreateTool = new CreateTool(tacticalSymbolsDataSet);

            ...
        }

        ...

        public void Receive(SymbolSelectedMessage message)
        {
            if (!message.SymbolMetadata.Supported)
                return;

            string sidc = message.SymbolMetadata.Sidc[..3] + GetAffiliation(message.Affiliation) + message.SymbolMetadata.Sidc[4..];

            try
            {
                var createToolParameters = new MilitaryDCreateToolParameters(sidc);
                _tacticalCreateTool.Parameters = createToolParameters;

                CurrentTool = _tacticalCreateTool;
            }
            catch(EngineException ex)
            {
                // Logging, etc..
            }
        }

        private static char GetAffiliation(string affiliation) => affiliation switch
        {
            "Pending" => '0',
            "Unknown" => '1',
            "Friend" => '3',
            "Neutral" => '4',
            "Hostile" => '6',
            _ => '1'
        };
    }
}
The new Receive method will parse the received message for SymbolMetadata along with the affiliation. It will then do some string manipulation on the SIDC code on the selected symbol to set the affiliation on the displayed symbol. For more specifics about SIDC codes please view the Carmenta Engine SDK documentation.
Running the app
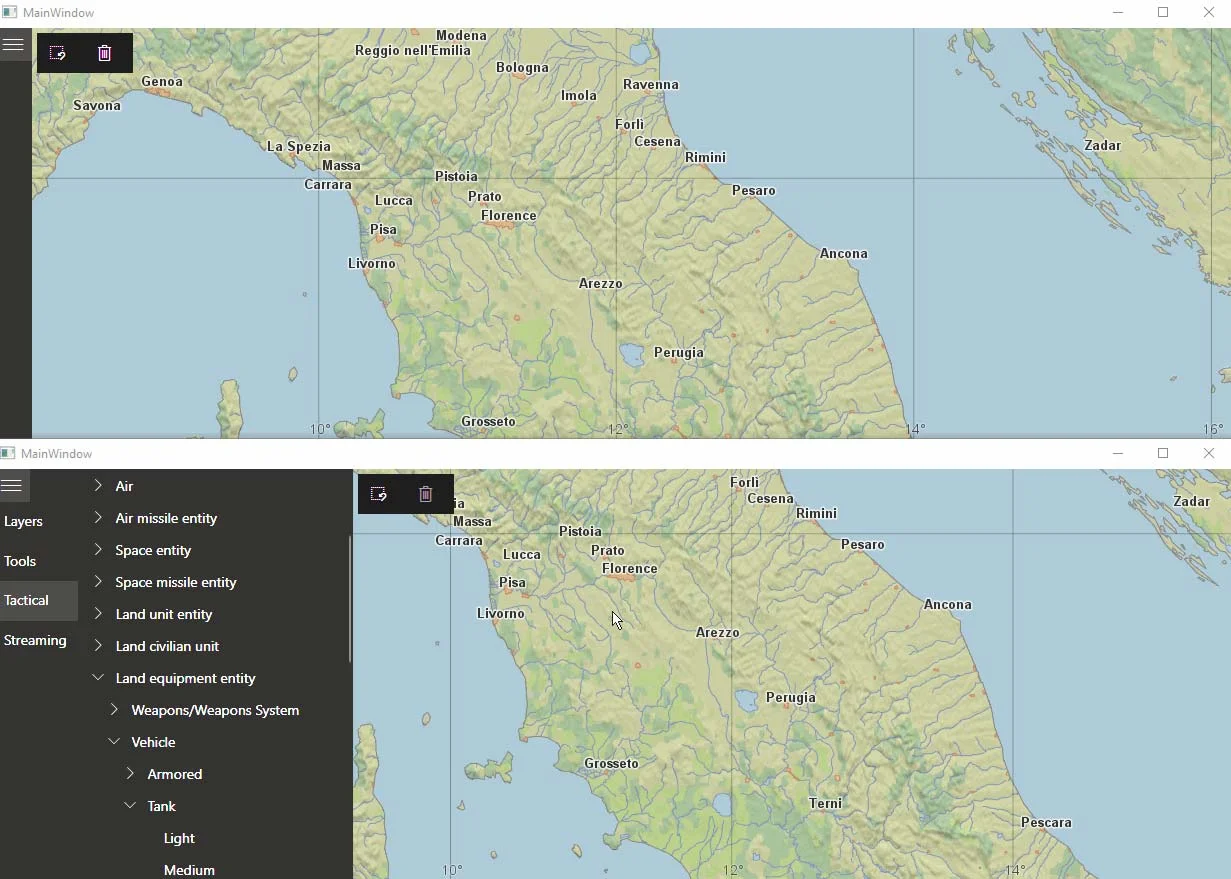
With these changes in place, the application should run and the tactical symbols menu will be available through the drawer menu:
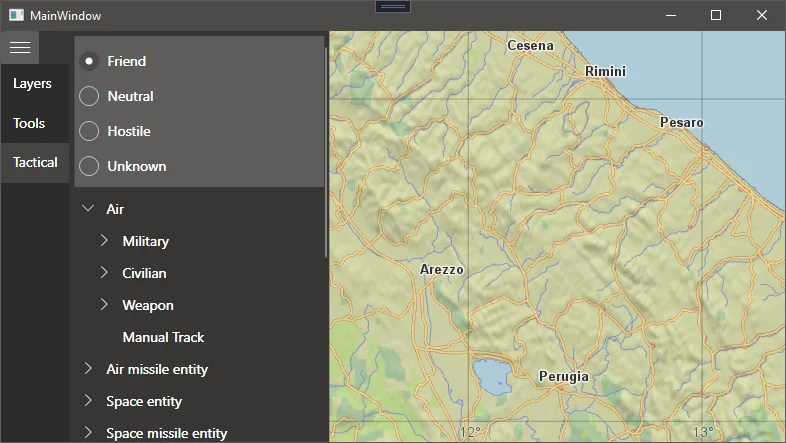
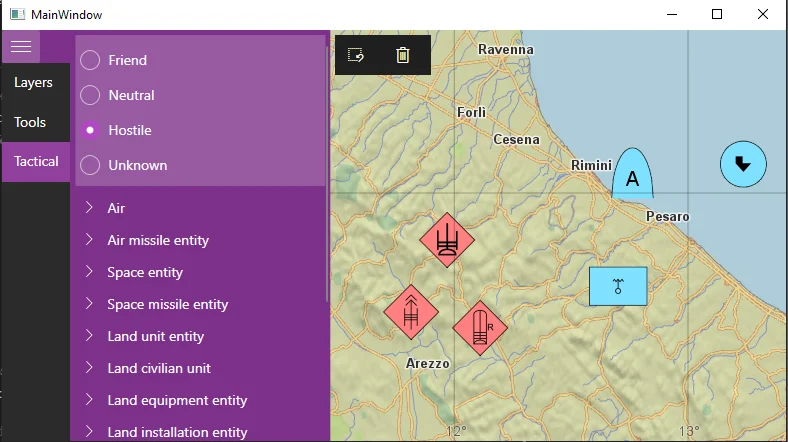
Play around by selecting different symbols and affiliation in the list and create symbols by clicking in the map.
Removing map features
One feature missing from the application is the ability to remove selected features or symbols. For convenience, we will add a quick access bar to the main UI where we can switch to the standard tool and also delete selected features.
Let’s start by creating a new message that we will send when we want to remove all selected ids. Create a simple empty record type in Messages\DeleteSelectedFeatures.cs:
Messages\DeleteSelectedFeatures.cs
namespace CarmentaWpfClient.Messages;

public record DeleteSelectedFeatures;
Then extend MapViewModel.cs accordingly:
ViewModels\MapViewModel.cs
...
using System.Collections.Generic;
using System.Linq;

namespace CarmentaDemoWPF.ViewModels
{
    public partial class MapViewModel :
        ... ,
        IRecipient<DeleteSelectedFeatures>
    {
        ...
        private readonly Dictionary<ulong, MemoryDataSet> _dataSetLookup;

        private IdCollection _selectedIds = new();
        ...

        public MapViewModel(View view)
        {
            ...
             _dataSetLookup = new Dictionary<ulong, MemoryDataSet>
            {
                {featureMemoryDataSet.Id, featureMemoryDataSet },
                {tacticalSymbolsDataSet.Id, tacticalSymbolsDataSet }
            };
            CurrneMap.View.SelectionChanged += ViewSelectionChanged;
        }

        private void ViewSelectionChanged(object? _, EventArgs __)
        {
            _selectedIds = View.GetSelectedIds();
            OnPropertyChanged(nameof(CanDeleteFeatures));
        }

        public bool CanDeleteFeatures => _selectedIds.Count > 0;

        ...

        public void Receive(DeleteSelectedFeatures message)
        {
            foreach(var id in _selectedIds)
            {
                var ds = _dataSetLookup[id.DataSetId];
                using var guard = new Guard(ds);

                ds.Remove(id);
            }
        }
    }
}
We’ve added quite a few things to MapViewModel.cs; the new private field _dataSetLookup is constructed by using the ids of both MemoryDataSets and using that as a key to lookup the datasets themselves. This way we can use the Id.DataSetId on our selected features to quickly remove them from the correct data set. This is later performed in the newly implemented Receive method.
We also added an event handler to the View.SelectionChanged event, where we add the list of selected ids to a private field every time the selection changes.
In the same event handler we call the OnPropertyChanged method to signal to the view whether we can delete features or not.
Next, extend the view by modifying MainViewModel.xaml:
View\MainViewModel.xaml
<UserControl x:Class="CarmentaWpfClient.Views.MainView"
             ...>
    <Grid>
        <local:MapView DataContext="{Binding MapViewModel}"/>
        <Grid>
            <Grid.ColumnDefinitions>
                <ColumnDefinition Width="Auto" />
                <ColumnDefinition Width="Auto" />
            </Grid.ColumnDefinitions>
            ...
            <ui:CommandBar Grid.Column="1" Margin="5" >
                <ui:AppBarButton Icon="ClearSelection" Command="{Binding ResetToolCommand}" />
                <ui:AppBarButton Icon="Delete" Command="{Binding DeleteFeaturesCommand}" IsEnabled="{Binding MapViewModel.CanDeleteFeatures}"/>
            </ui:CommandBar>
        </Grid>
    </Grid>
</UserControl>
We added a CommandBar, containing two buttons, one for enabling the standard tool and one for deleting the selected features. The latter will be enabled according to the new property we described on the MapViewModel. Last, add the new commands to MainViewModel.cs:
...
namespace CarmentaWpfClient.ViewModels
{

    public partial class MainViewModel : ObservableObject

    {
        ...

        [RelayCommand]
        private void ResetTool()
        {
            WeakReferenceMessenger.Default.Send(new ChangeToolMessage(ToolType.Standard));
        }

        [RelayCommand]
        private void DeleteFeatures()
        {
            WeakReferenceMessenger.Default.Send(new DeleteSelectedFeatures());
        }
    }
}
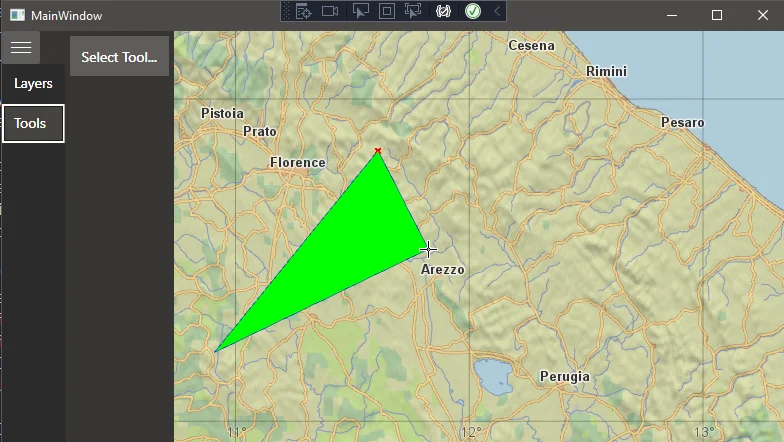
Try starting the application and try out the new functionality by creating features and then switching to the standard tool, clicking a feature to select it and the deleting it.
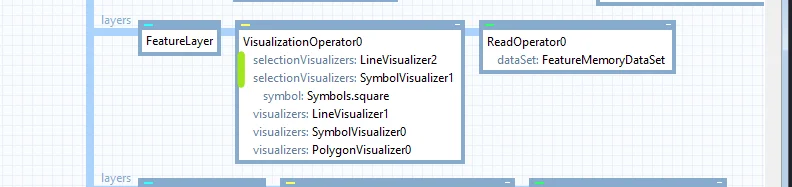
Tip: One thing you might notice is missing at this point is some sort of feedback on whether the feature you clicked is selected or not. To add this visualization we can add SelectionVisualizers to the VisualizationOperator on the FeatureLayer in world_map.px. For example, add a SymbolVisualizer and a LineVisualizer to the set selection visualizers and give them a style which would make them be discernable from the ordinary visualization:
Save the configuration and restart the application. When clicking on features, they should be visualized with the newly added selection visualizers.
Conclusion
In this article, we’ve seen how to:
- Use Tactical Extension to work with tactical symbols
- Select features in the map and use
SelectionVisualizers
- Delete selected features and finding the data set they reside in using the
Id.DataSetId property
In the final article in this series, we’ll add a socket server to synchronize features between multiple clients. Until then, happy coding!