Next Post
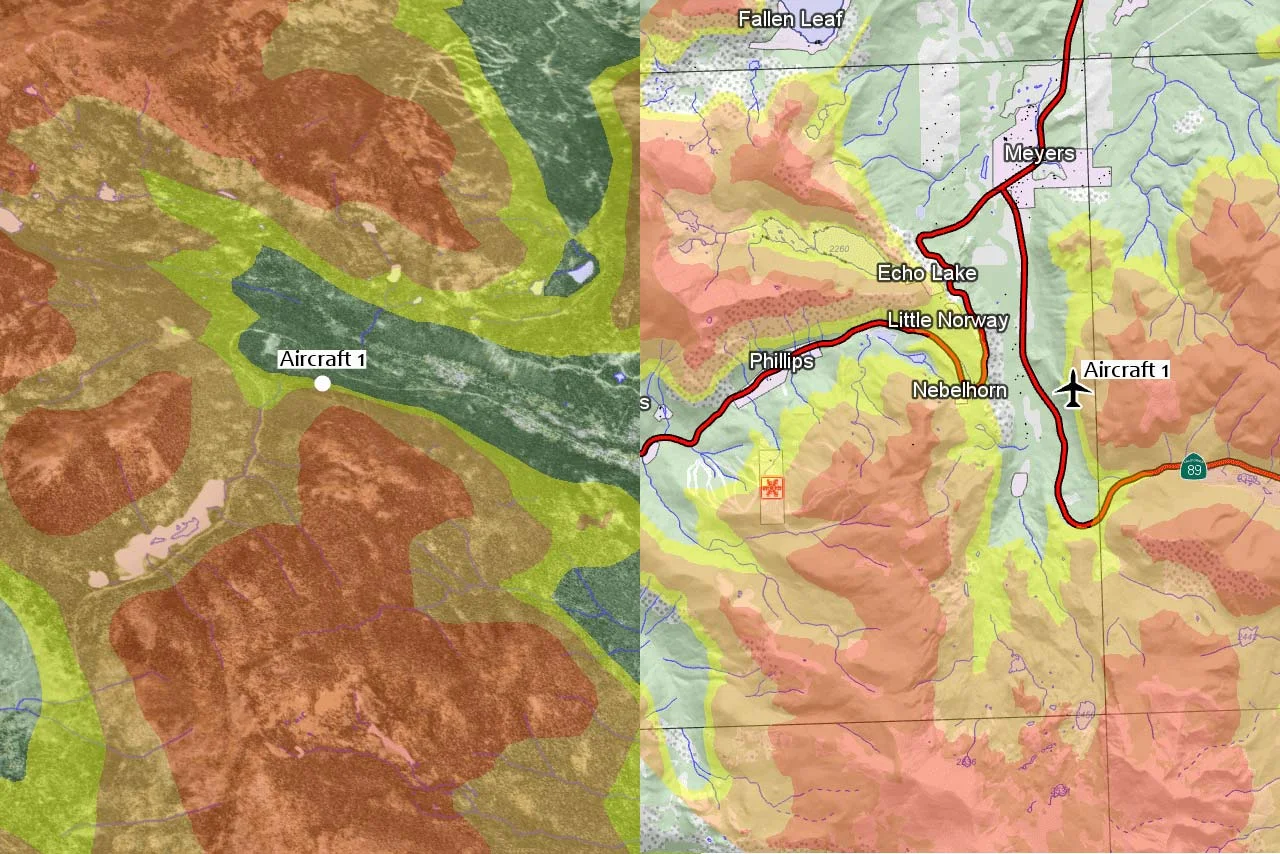
Terrain Warning Analysis in 2D and 3D
Learn how to configure terrain warning in 2D and 3D with Carmenta Engine using TerrainWarningOverlay and TerrainWarningOperator.
View PostDeveloping geospatial applications for Android using Carmenta Engine offers powerful tools for displaying and interacting with map data. In this article, we explore the process of building a basic application using Android Studio and Kotlin, specifically targeting Android 9 (API 28, Pie). We discuss integrating the Carmenta Engine SDK, managing configurations, and leveraging interactive map controls.
In this article we need to note that changes introduced with Android 10 (API 29, Q), notably Scoped Storage, which restricts direct access to the root internal and external storage. Consequently, this article targets Android 9 or lower to simplify file management.
Effective testing requires using an Android Virtual Device (AVD) configured with
Ensure virtualization is enabled in your system, press the Windows key and search “Turn Windows features on or off” and make sure these are enabled:
Also make sure that Android Emulator Hypervisor Driver is installed from Android Studio’s SDK Manager.
This sample application follow a component-based architecture where various elements work together to render and interact with geospatial data. The main components we’ll work with include:
To integrate Carmenta Engine into your Android project, manually add the Carmenta Engine AAR file to your project’s /app/libs directory. Update your build.gradle.kts dependencies accordingly:
implementation(files("libs/carmenta-engine.aar"))
The carmenta-engine.aar file, on Windows, can be copied from: C:\Program Files\Carmenta\Carmenta Engine 5 SDK\android
Synchronize the project to include the new dependency.
Carmenta Engine requires specific configuration and license files to run. The .px configuration file will be placed at:
{ProjectFolder}/app/src/main/assets/carmenta.engine/configuration/map.px
The Carmenta license key must be renamed License.carmentakey and placed in:
{ProjectFolder}/app/src/main/assets/carmenta.engine/data
Ensure these files appear correctly in Android Studio’s project explorer.
While Android’s storage policies vary by API, a straightforward approach for this scenario involves manually copying geospatial files tahoe5.mpx to the application’s internal storage. A more robust solution would depend on the targeted API level and security considerations.
Create a Kotlin activity inheriting from EngineActivity. Initialize Carmenta Engine runtime within your activity’s onCreate method:
override fun onCreate(savedInstanceState: Bundle?) {
    super.onCreate(savedInstanceState)
    setContentView(R.layout.activity_map)

    Runtime.initialize()

    mapControl = findViewById(R.id.mapControl)
    val errorListener = ErrorListener { ev ->
        run {
            // Handle errors
            Log.e("CE_App", ev.message)
        }
    }
    mapControl?.addErrorListener(errorListener)

    val configPath = "$filesDir/carmenta.engine/configuration/map.px"
    val configuration = Configuration(configPath)
    val view = configuration.getPublicObject("View0") as View

    mapControl?.view = view
}
In your layout XML activity_map.xml, define the MapControl:
<com.carmenta.engine.android.MapControl
    android:id="@+id/mapControl"
    android:layout_width="match_parent"
    android:layout_height="match_parent"/>
Ensure proper lifecycle management by shutting down Carmenta Engine in your activity’s onDestroy method:
override fun onDestroy() {
    super.onDestroy()
    if (Runtime.isInitialized()) {
        Runtime.shutdown()
    }
}
Carmenta Engine includes built-in tools for intuitive user interaction. Activate the standard touch interaction within your activity:
val touchTool = StandardTouchTool()
mapControl?.touchTool = touchTool
This interaction supports common gestures like double-tap zoom and panning.
You can now run and test the application:
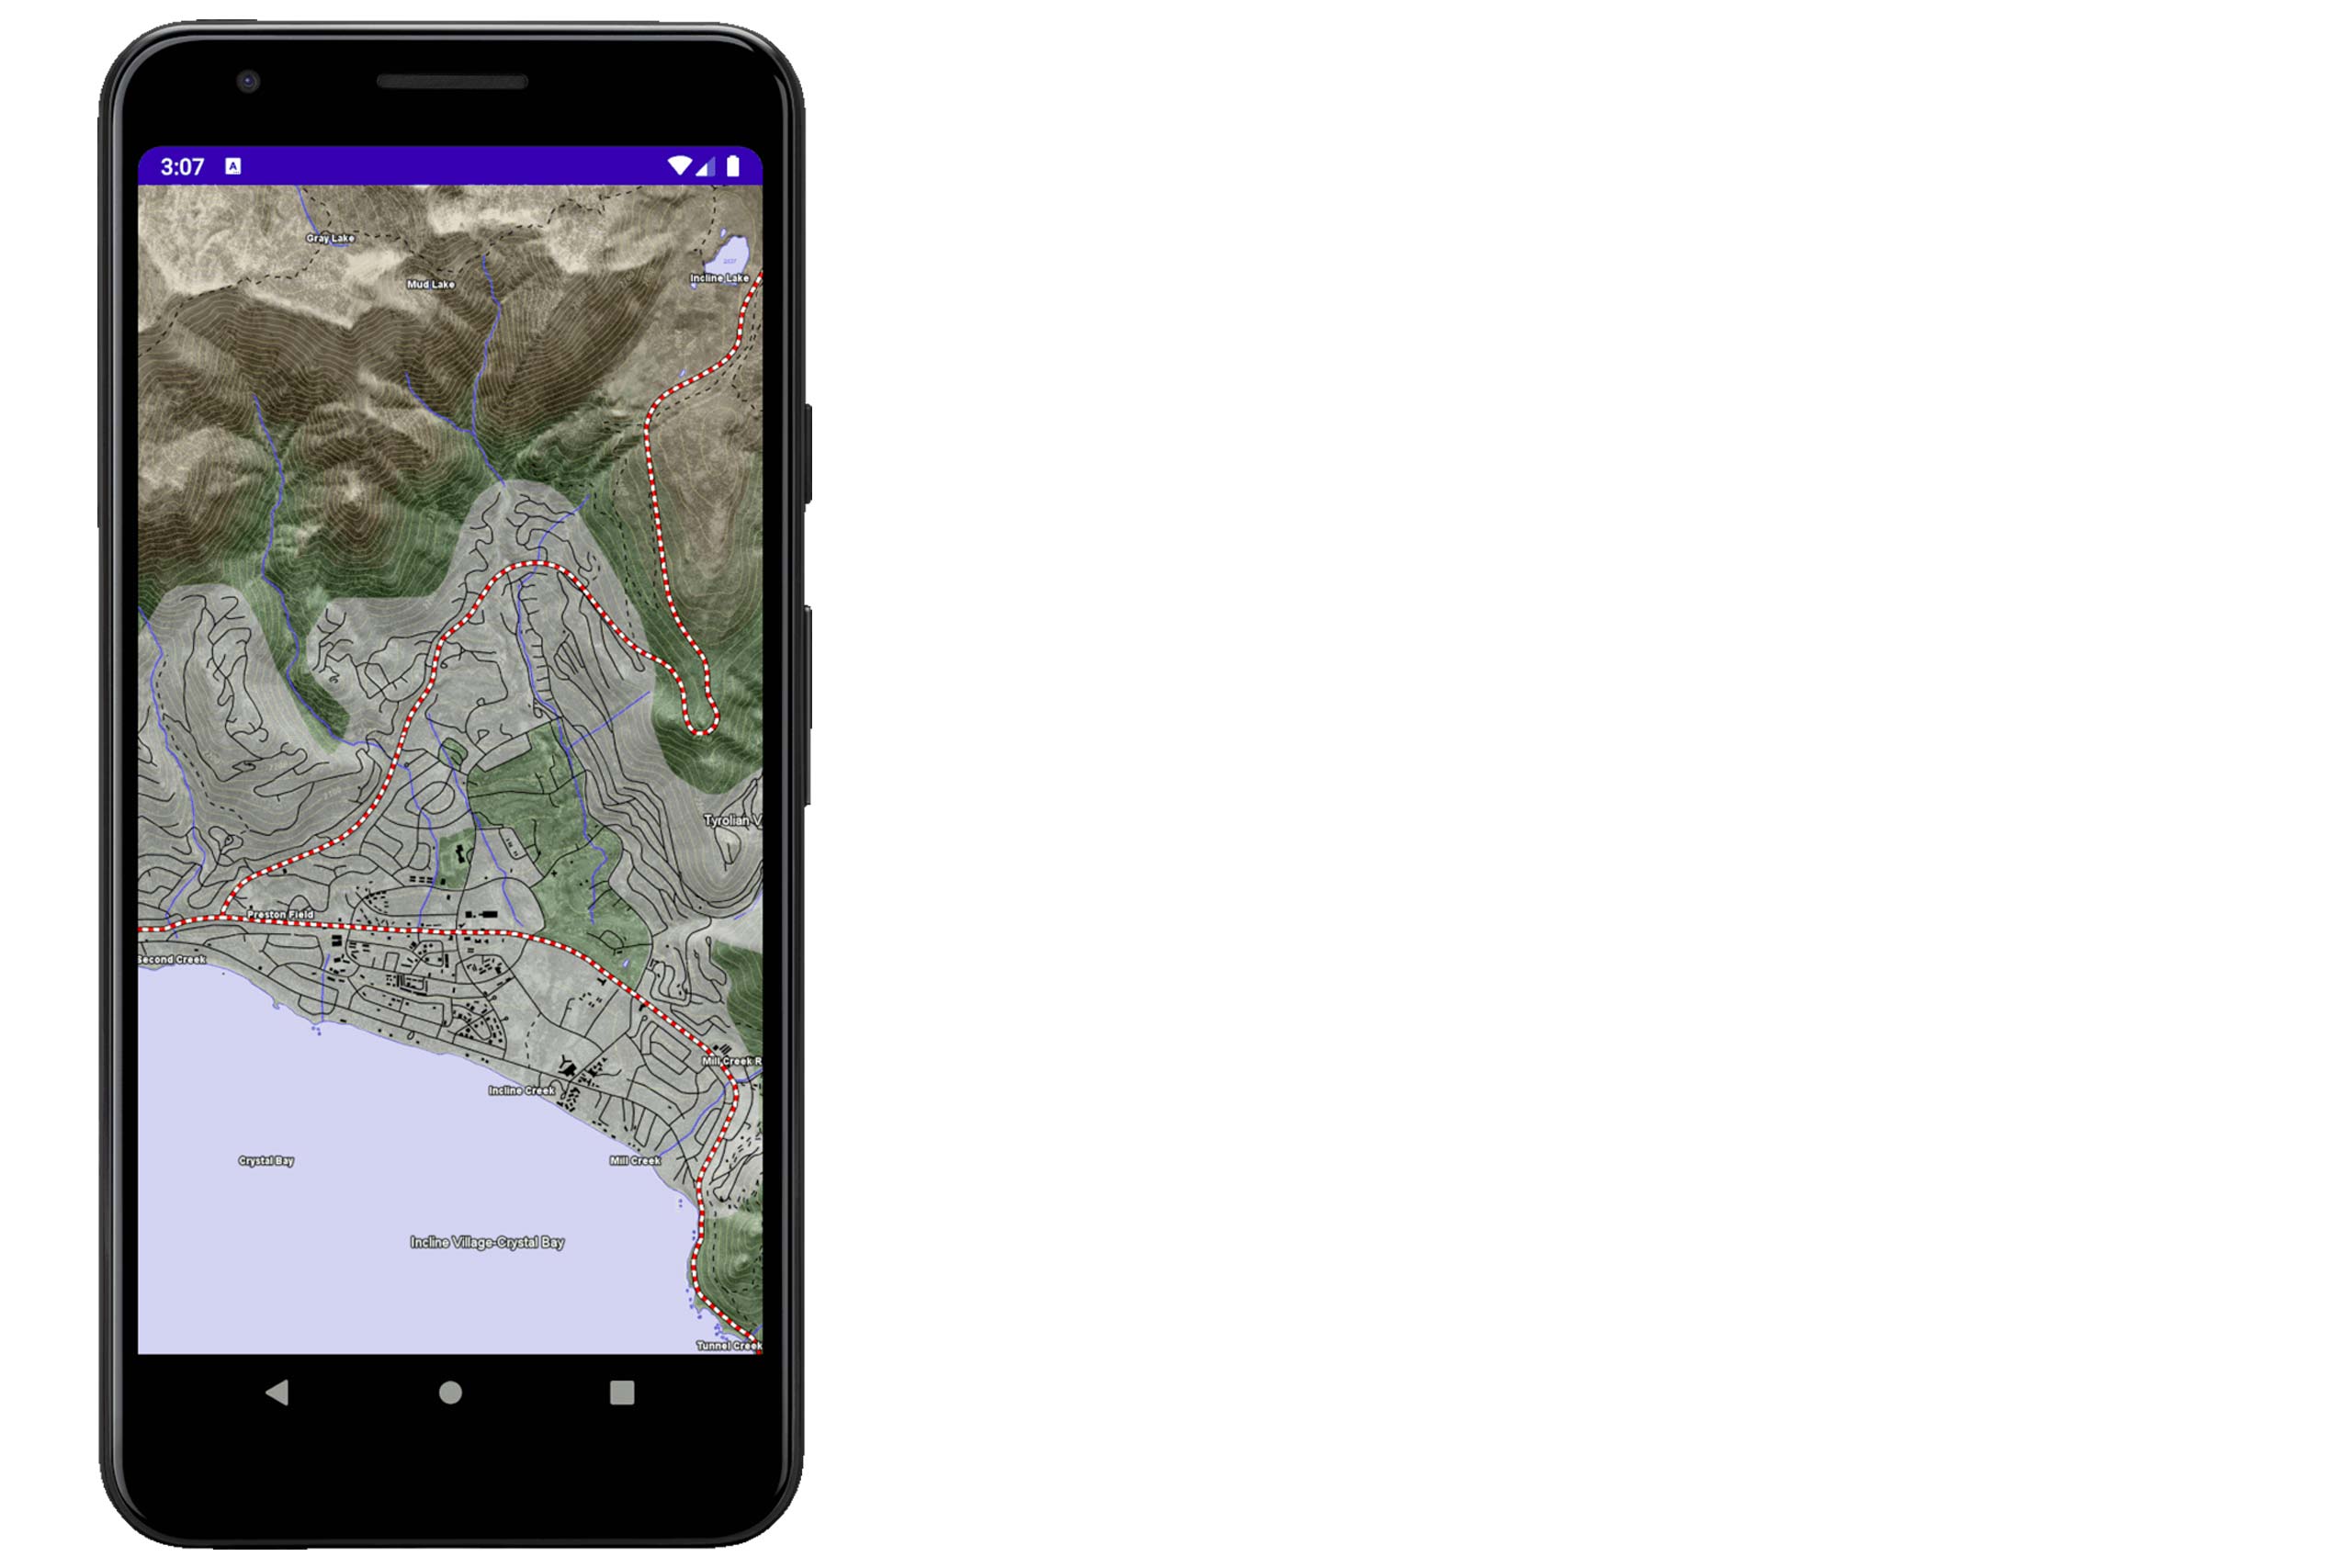
You should have something similar to:
class MapActivity : EngineActivity() {
    private var mapControl: MapControl? = null

    override fun onCreate(savedInstanceState: Bundle?) {
        super.onCreate(savedInstanceState)
        setContentView(R.layout.activity_map)

        ViewCompat.setOnApplyWindowInsetsListener(findViewById(R.id.main)) { v, insets ->
            val systemBars = insets.getInsets(WindowInsetsCompat.Type.systemBars())
            v.setPadding(systemBars.left, systemBars.top, systemBars.right, systemBars.bottom)
            insets
        }

        // Initialize Carmenta Runtime
        Runtime.initialize()

        // Create a map control
        mapControl = findViewById(R.id.mapControl)

        // Error listener
        val errorListener = ErrorListener { ev ->
            run {
                // Handle errors
                Log.e("CE_App", ev.message)
            }
        }
        mapControl?.addErrorListener(errorListener)

        // Load the Configuration file
        val configPath = "$filesDir/carmenta.engine/configuration/map.px"
        val configuration = Configuration(configPath)

        // Retrieve the Main View from the Configuration
        val view = configuration.getPublicObject("View0") as View

        // Assign the view to the Map Control
        mapControl?.view = view

        // Add interaction capabilities
        val touchTool = StandardTouchTool()
        mapControl?.touchTool = touchTool
    }

    override fun onDestroy() {
        super.onDestroy()
        if (Runtime.isInitialized()) {
            Runtime.shutdown()
        }
    }
}
The relationship between the components follow a pattern that might be familiar if you think about domain-driven design:
Runtime is initialized first – this is the core engine that powers everythingMapControl to the layoutView object which represents the visual presentationStandardTouchToolIn this article, we’ve explored how to create an interactive Android map application leveraging Carmenta Engine and Kotlin. While the example targets Android 9, similar approaches can be adapted for newer versions, taking into account Android’s evolving security and storage frameworks. This foundational knowledge will enable you to build sophisticated geospatial applications with rich interactivity on Android platforms.
Learn how to configure terrain warning in 2D and 3D with Carmenta Engine using TerrainWarningOverlay and TerrainWarningOperator.
View Post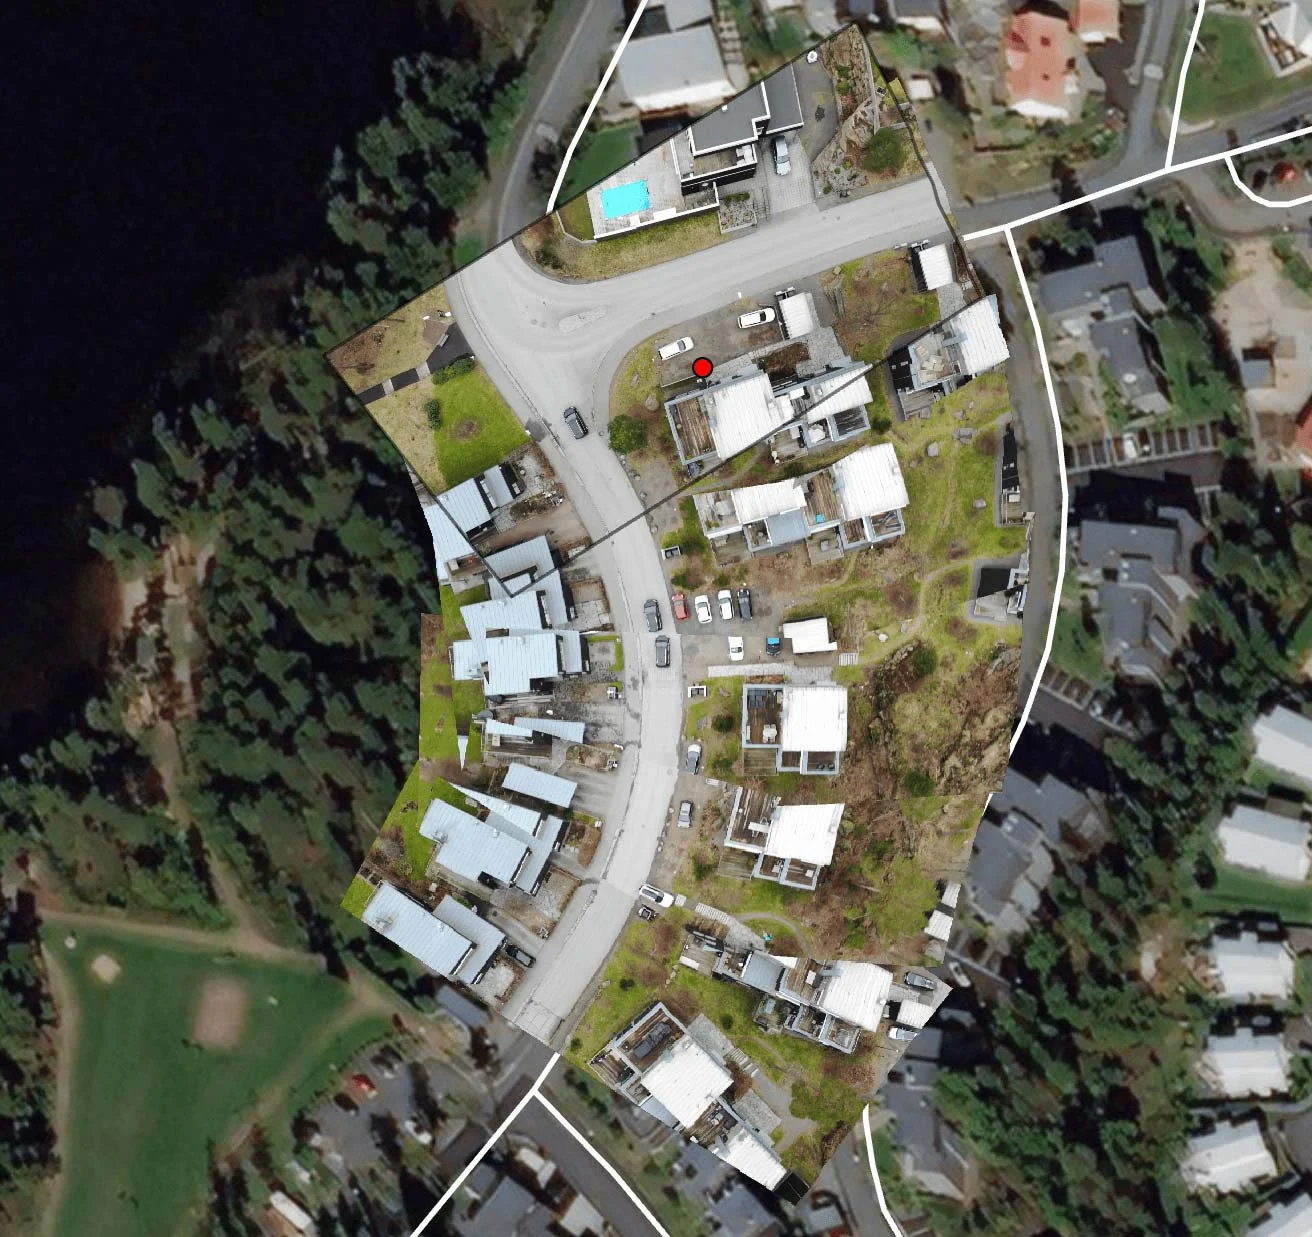
Learn how to use Carmenta Engine 5.17's MosaicWriter to stitch georeferenced drone video frames into GeoPackage mosaics for real-time mapping applications.
View Post