Next Post
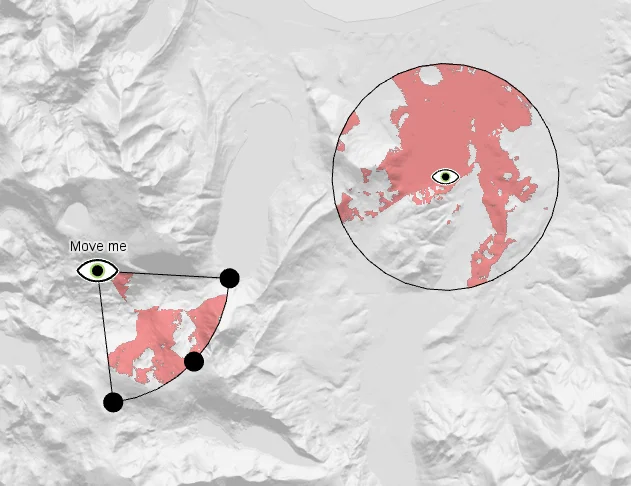
Dynamic Visibility Analyses
Learn how to configure dynamic visibility analysis in Carmenta Engine. This guide covers line-of-sight setup for sensors, cameras, and moving observers.
View Post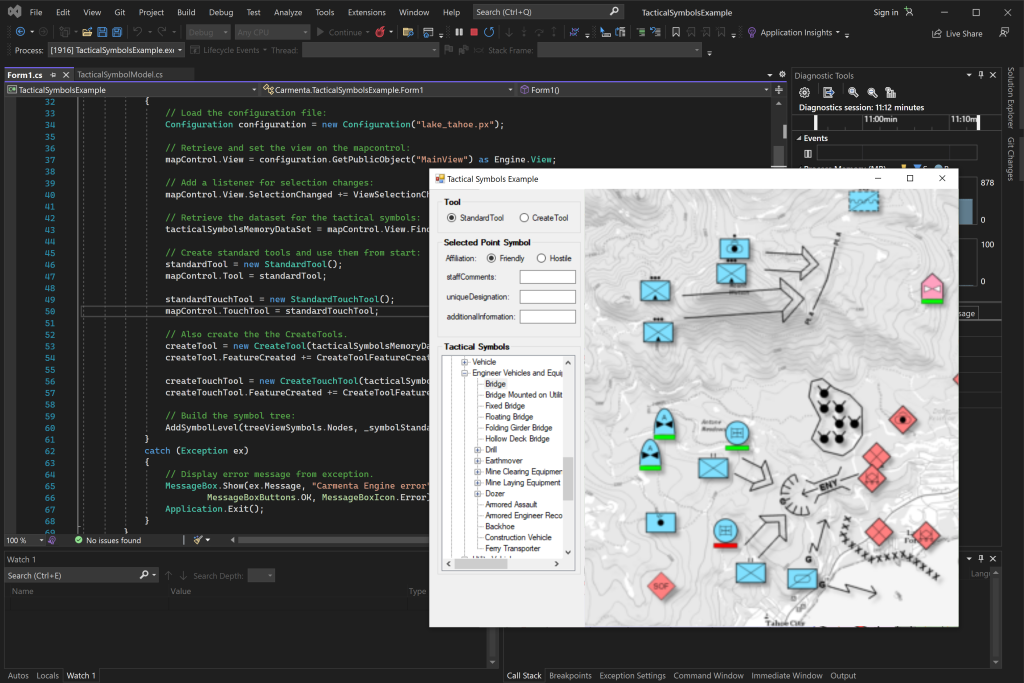
Through its tactical extension, Carmenta Engine provides support for visualization and editing of tactical symbols and graphics according to widely used military standards. Currently, the supported standards are MIL-STD-2525 versions B, C and D, as well as NATO App-6 versions B, C and D.
Using a few well-chosen feature attributes, it becomes easy to visualize objects from an already existing dataset as a tactical overlay on a background map. Carmenta Engine’s standard tools have full support for dynamically creating and modifying tactical features directly on the map.
In this article, we will cover the basic layer chain which can be used to display a tactical overlay, as well as how to control the symbol modifiers from Feature attributes.
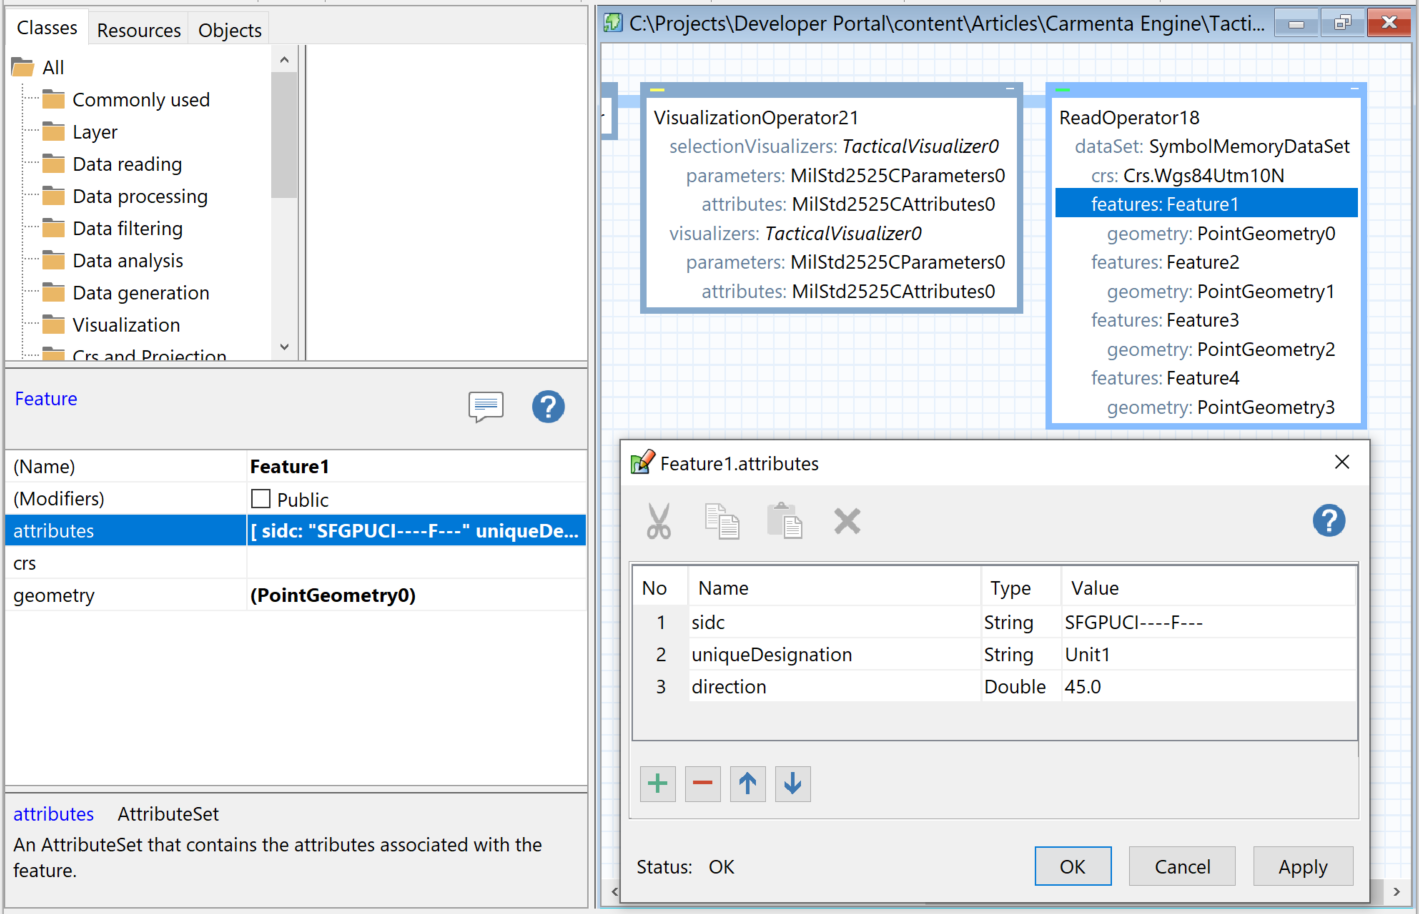
A simple way to integrate a tactical overlay into a map configuration file would be to create a layer chain similar to the one in the picture below:

Attached to the View is an OrdinaryLayer, in the example called TacticalLayer. The layer consists of a short chain of two operators.
The first operator is a VisualizationOperator, which contains a TacticalVisualizer. It’s by setting the parameters property on the visualizer that you specify which military standard will be applied for the visualization. In order to let the user interact with the visualized features, you should also add a reference to this visualizer to the list of selection visualizers, and mark the layer as selectable.
The second operator is a ReadOperator. It reads features from a dataset, in the typical case a MemoryDataSet. In this example, we create the 4 features directly in the configuration, but these can also be created from application code, based on your own user data.
The core concept when working with tactical symbology is to use the SIDC codes. These mandatory codes define the basic visualization of each feature. For the military standards B and C, the SIDC is a 15-character string, and for the newer standard D, it is a 20-digit string. The chosen SIDC code should be set in the attributes for each feature. For example, with MIL-STD-2525C, you can set one sidc attribute like: [sidc: "SFGPUCI----F---"].

See the picture below for an example of how such a simple tactical layer chain can look like.

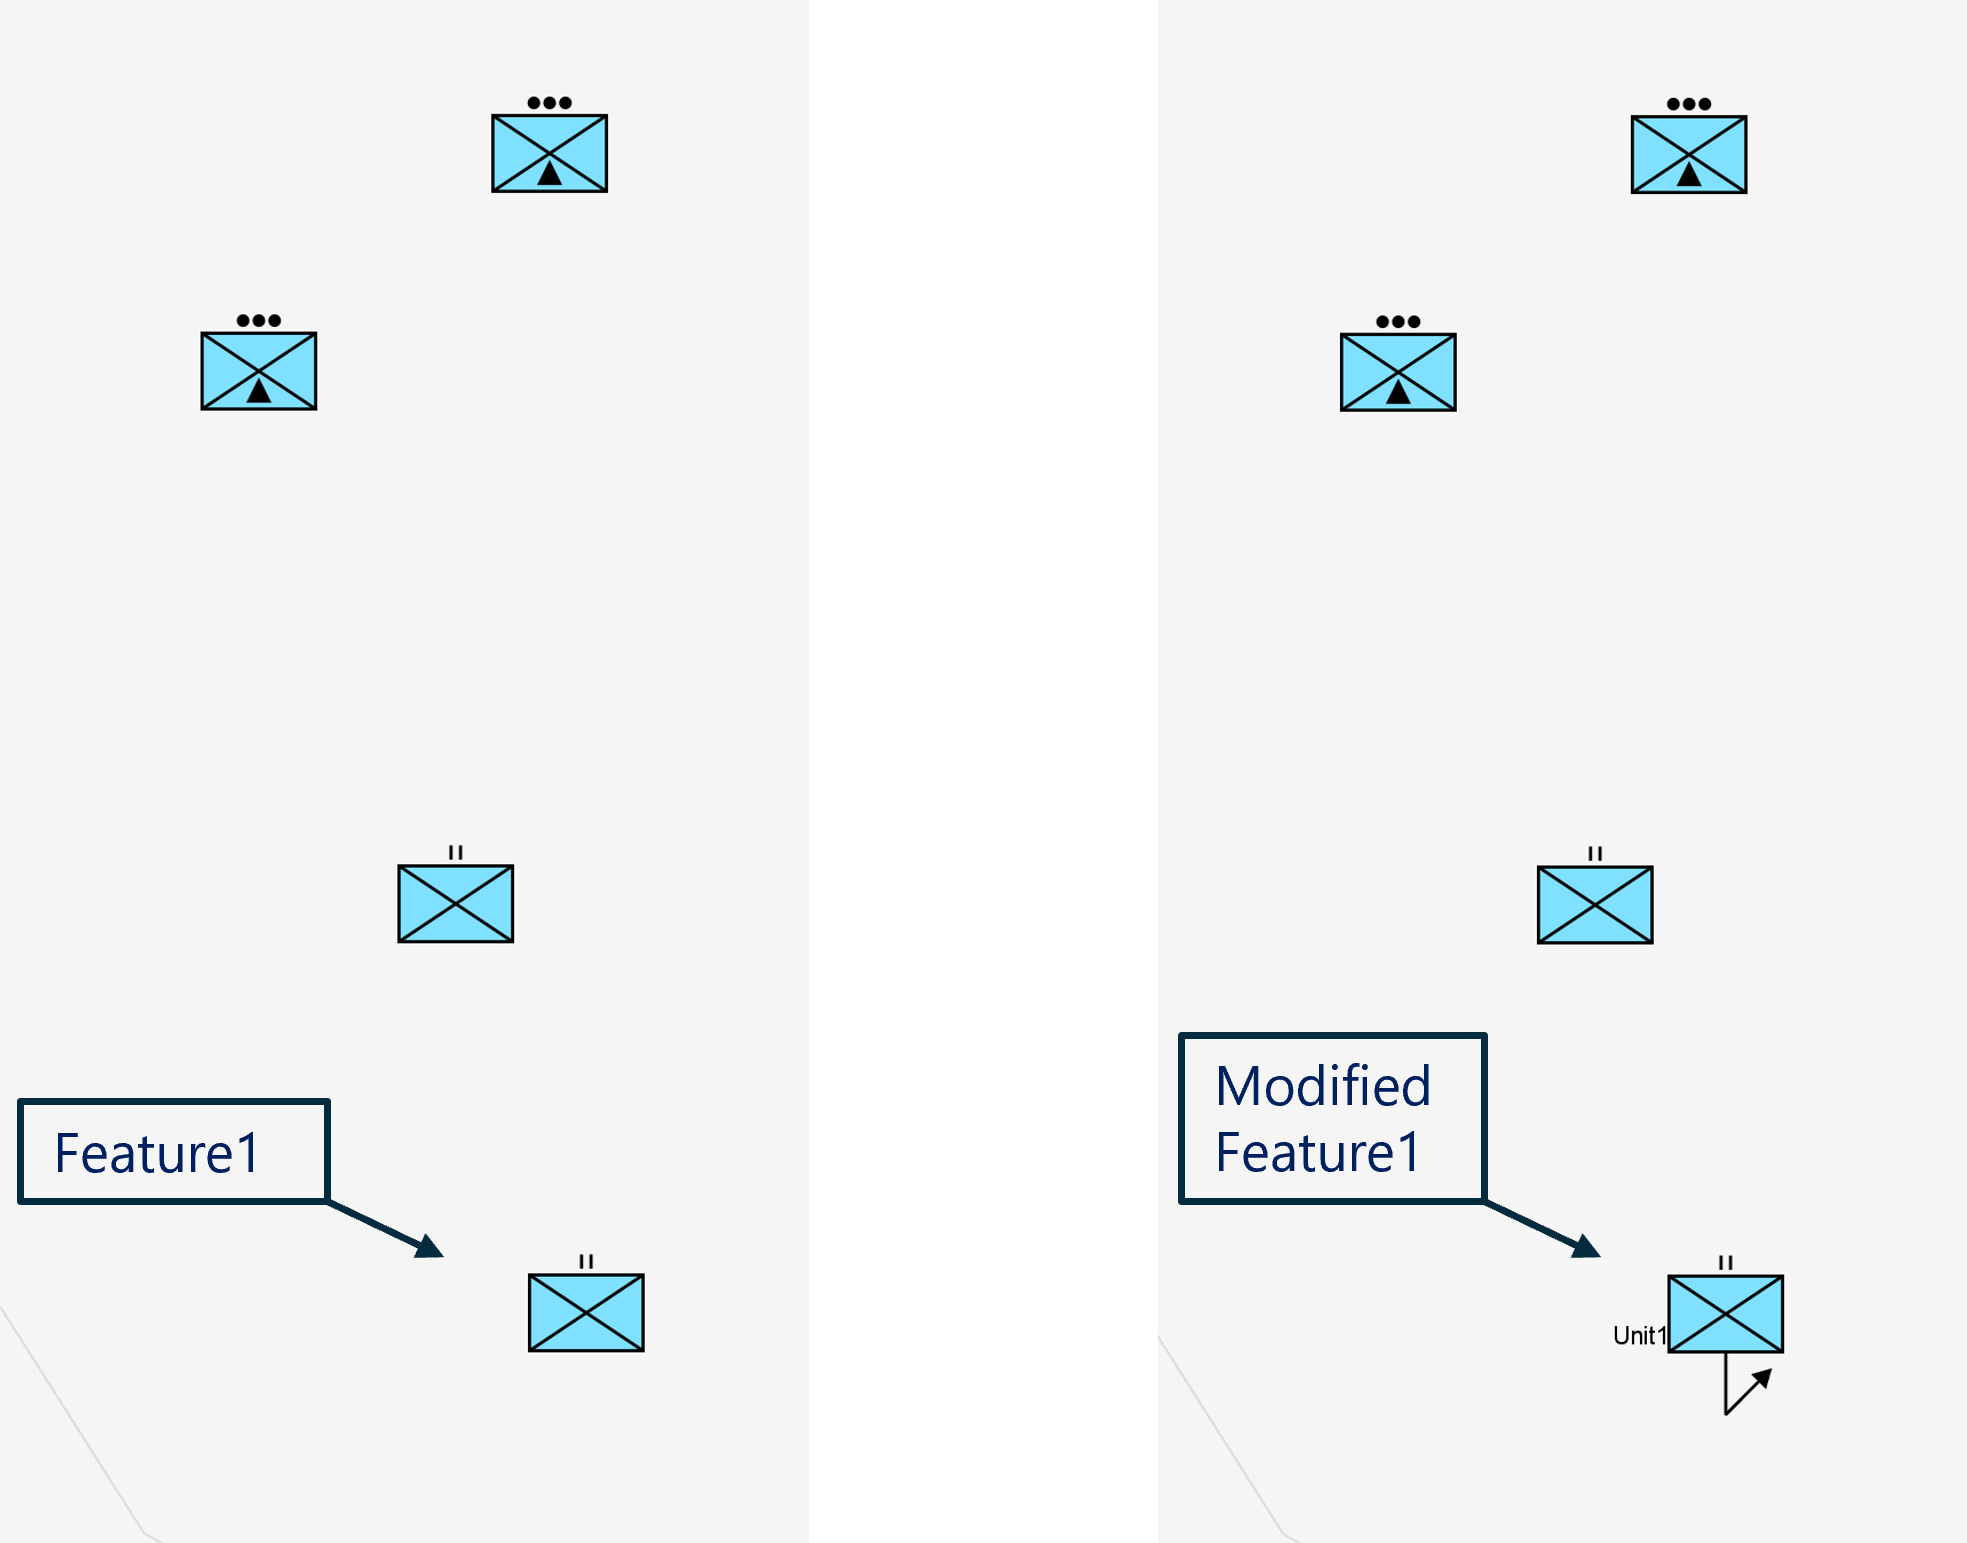
You can modify the features further by setting more attributes. In the previous section, we only set the mandatory SIDC attribute, but the military standards support many more symbol modifiers. You can have a look at classes Mil2525BAttributes, Mil2525CAttributes, App6BAttributes, App6CDraft1Attributes, and MilitaryDAttributes for the full list of modifiers supported by Carmenta Engine.
To give you an idea of how this works, we update one of the features with two more attributes, uniqueDesignation and direction.
The unique designation is a modifier available on almost all symbols, in which you can give a name to the tactical object. The direction should hold a numerical value which represents the heading of the symbol, and will be displayed as an arrow below the symbol. These are just two examples, but you can use any attribute defined by the Carmenta Engine military attribute classes.
To customize the default attribute names, you can also manually add an instance of the Mil2525BAttributes, Mil2525CAttributes, App6BAttributes, App6CDraft1Attributes or MilitaryDAttributes to the property TacticalVisualizer.parameters.attributes. In the example we added a MilStd2525CAttributes. A use case of this is to reuse existing feature attributes on the tactical modifiers. You could for example use an existing #heading attribute instead of the default #direction attribute, if the heading is already defined on the feature.
Learn how to configure dynamic visibility analysis in Carmenta Engine. This guide covers line-of-sight setup for sensors, cameras, and moving observers.
View Post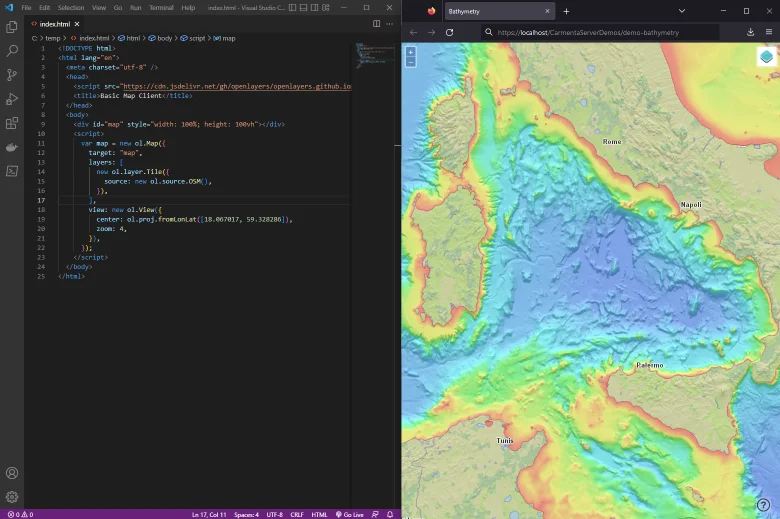
Learn how to consume Carmenta Server map services using OpenLayers. Step-by-step guide for integrating OGC-compliant layers into web mapping applications.
View Post