Next Post
Making a script to save map images
Learn how to automate map image exports using Carmenta Engine. This tutorial shows how to script efficient workflows for saving geospatial map snapshots.
View Post
Carmenta Explorer can automatically generate a View and appropriate Layers for some raw data formats. It is then possible to package this result using standardized OGC® GeoPackages. This article will show this process and highlight how easy it is to read and visualize data stored in GeoPackages using Carmenta Studio.
This ZIP archive (31 MB) contains the end result of the steps in this article. The image data used here is found in Samples Geodata, but any GeoTIFF image will do to follow along with the instructions.
We’ll start by visualizing our map in Carmenta Explorer before we store it inside of an OGC GeoPackage.
Open up Carmenta Explorer. In this example, instead of reading a sample configuration, we will take raw data as input and let Carmenta Explorer build the configuration for us. Note that, from a GeoPackage standpoint, we could just as easily use a configuration we’ve made ourselves.
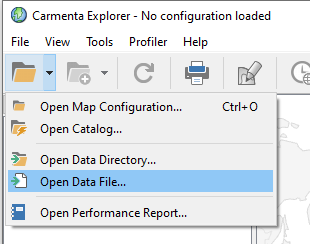
Using the drop-down arrow next to the “folder” button, select “Open Data File…”. In this example, we’ll use a GeoTIFF file for test purpose, bluemarble.tif. Select the file and click Open.
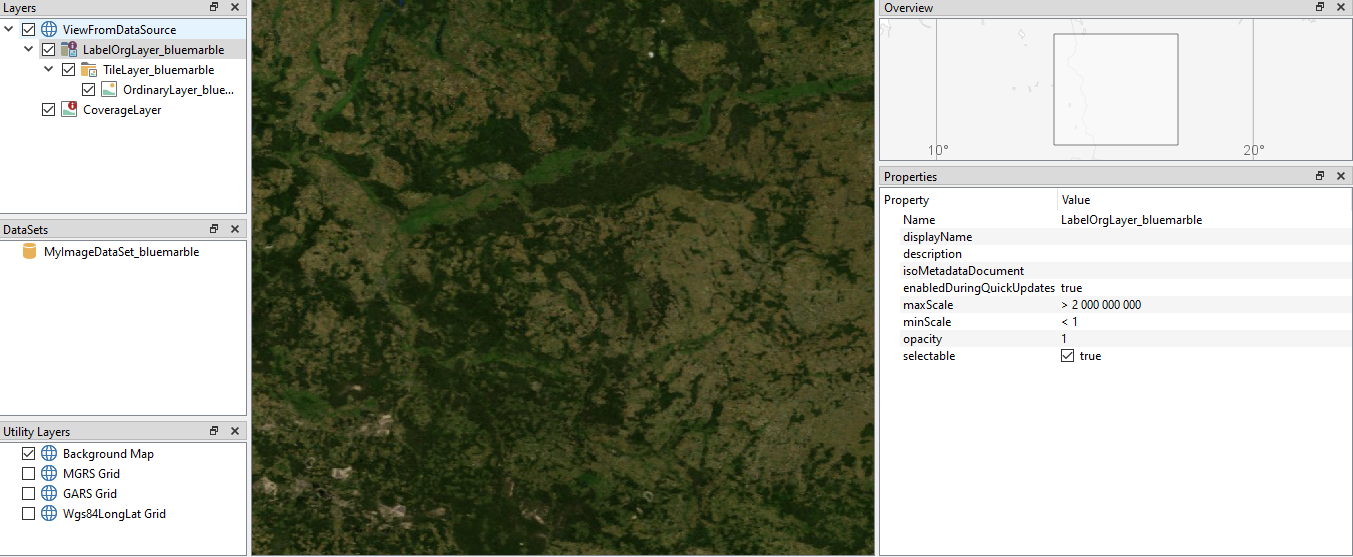
Above is a picture illustrating our initial view. Unfortunately, the default maximum scale is very limiting, if we zoom out just a bit further the entire world map becomes disabled. To fix this, press the Carmenta Studio button in the toolbar to open the configuration file in Carmenta Studio. Here we want to change/remove the maximum scale on the layer.
Carmenta Explorer supports a set of raw data types as input, such as GeoTIFF, Shapefile, JPEG 2000 and GeoPackage. Not every type of data can be loaded this way, but for supported data formats, it’s a great tool to inspect geodata. A great example is importing Shapefiles then selecting the features in the map to check their attributes, coordinate reference system etc.
Assuming we’re happy with how the map behaves in Carmenta Explorer, it is now time to package it in an OGC GeoPackage. To do this, open the File menu and click “Export to GeoPackage…”.
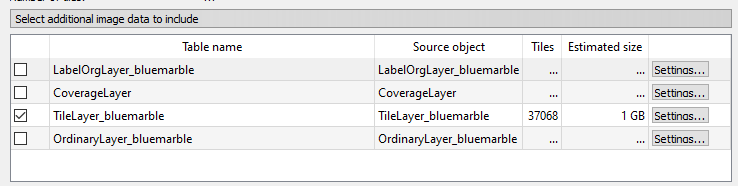
This opens a window filled with options including table names. Carmenta Engine can write three different types of data to GeoPackages:
Raster coverage data is raster data where the cells contain some sort of values or measurements, such as wave height, elevation or temperature.
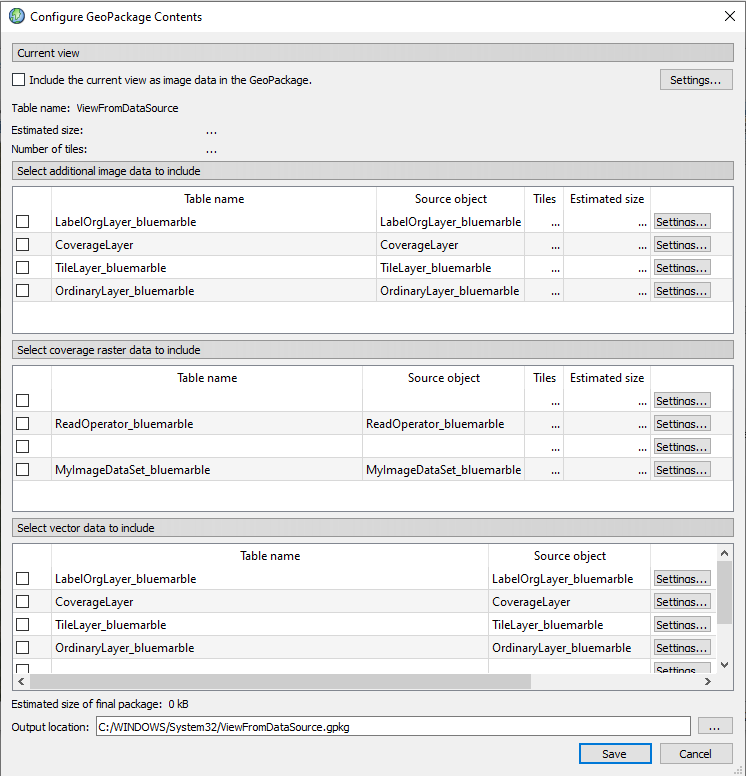
There are a set of check boxes next to each row entry. Check the box to include the specific table. We can and should edit table settings, giving them descriptive and unique names. Click OK, and Carmenta Explorer will calculate an estimated file size . The total size is shown at the bottom-left of the window.
There are different settings available for the different types of tables we can write: image, coverage, and vector, and each table has its own set of settings:
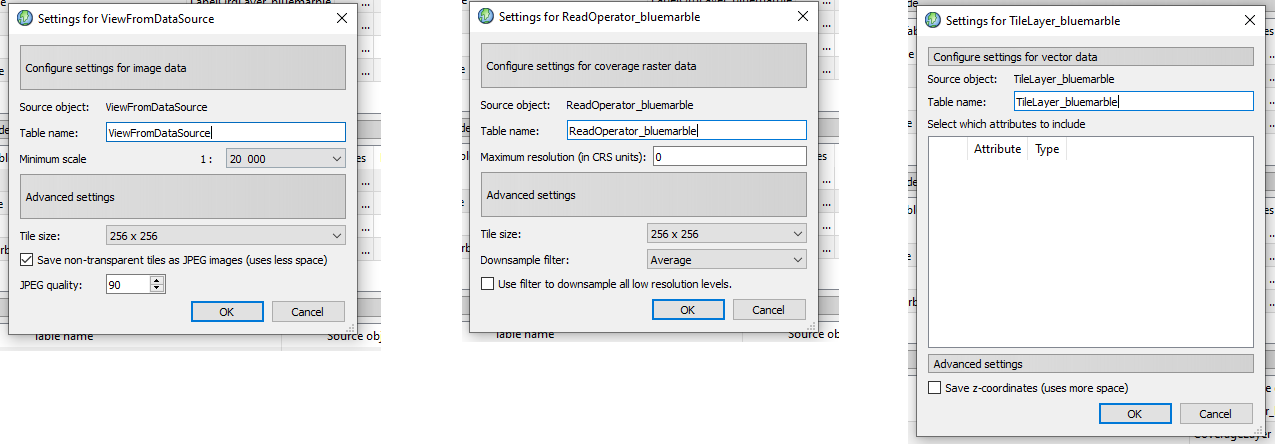
Note: Vector settings are not relevant in this example since we have no vector data. If the map had contained vector data, we’d have seen here a list of attributes that we could have chosen to include in the GeoPackage.
Image rasters and coverage rasters are similar with some small differences. Raster image settings present JPEG compression-specific options while raster coverage settings contain sampling options.
At the bottom of the Configure GeoPackage Contents dialog we select an output location and filename and click Save. The result is saved to a .gpkg file (GeoPackage’s extension). The packaging process may take some time, as the map has to be rendered at several scales and saved to the GeoPackage.
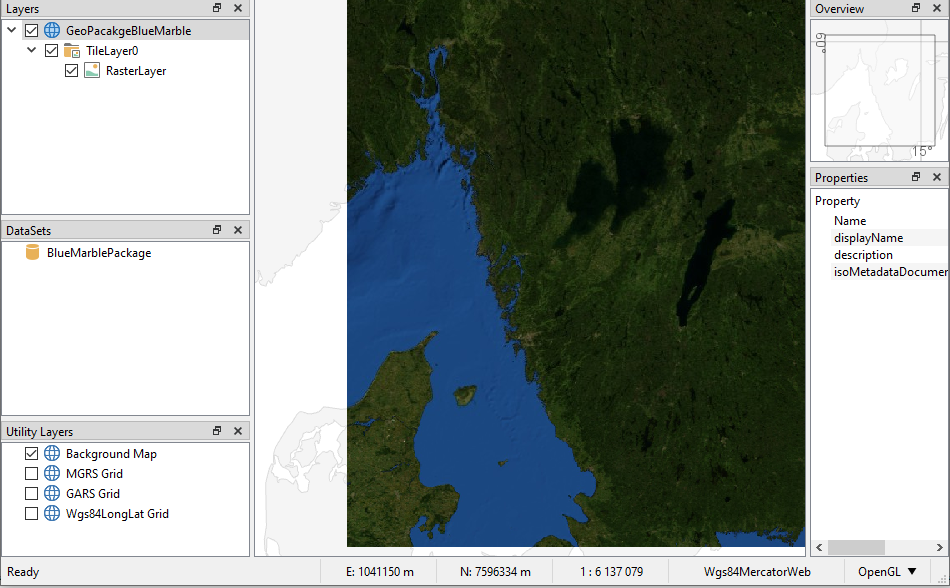
Reading OGC GeoPackages is easy with Carmenta Engine, simply use the MapPackageDataSet (or use Carmenta Explorer’s Open Data File… functionality). A sample is included to highlight how to use MapPackageDataSet, GeoPackageReader.px. In the previous section, we generated a GeoPackage BlueMarble.gpkg based on the bluemarble.tif raster image.
On the ReadOperator in GeoPackageReader.px we have attached a MapPackageDataSet. Two essential properties need to be set, fileName and tableName. Set fileName to point to the GeoPackage we made in the previous section. Next, press the “arrow down” button on the tableName property and look at the suggestions. If no suggestions are presented, either the GeoPackage is empty or Carmenta Engine could not find the file. Select the name of the table that was created by Carmenta Explorer. Now we attach the ReadOperator to an OrdinaryLayer, then a TileLayer for fast and efficient tile-based rendering, and finally we connect the TileLayer to a View and we are done.
The result is a visualization of a cutout part of the bluemarble.tif, given a specific boundary and scale level.
Today we have learned how to open a raw data file, in this case a GeoTIFF, letting Carmenta Explorer generate a default visualization of the data.
We have also seen how we can save a map as an OGC GeoPackage for convenient distribution of a selected subset of the data. We can choose to cut out a particular area and we can also choose which attributes to include when using vector data.
Hint: This is especially useful with file formats that consist of a large amount of files, like Shapefile.
Finally, we have shown how easy it is to read a GeoPackage in Carmenta Engine using MapPackageDataSet.
Learn how to automate map image exports using Carmenta Engine. This tutorial shows how to script efficient workflows for saving geospatial map snapshots.
View Post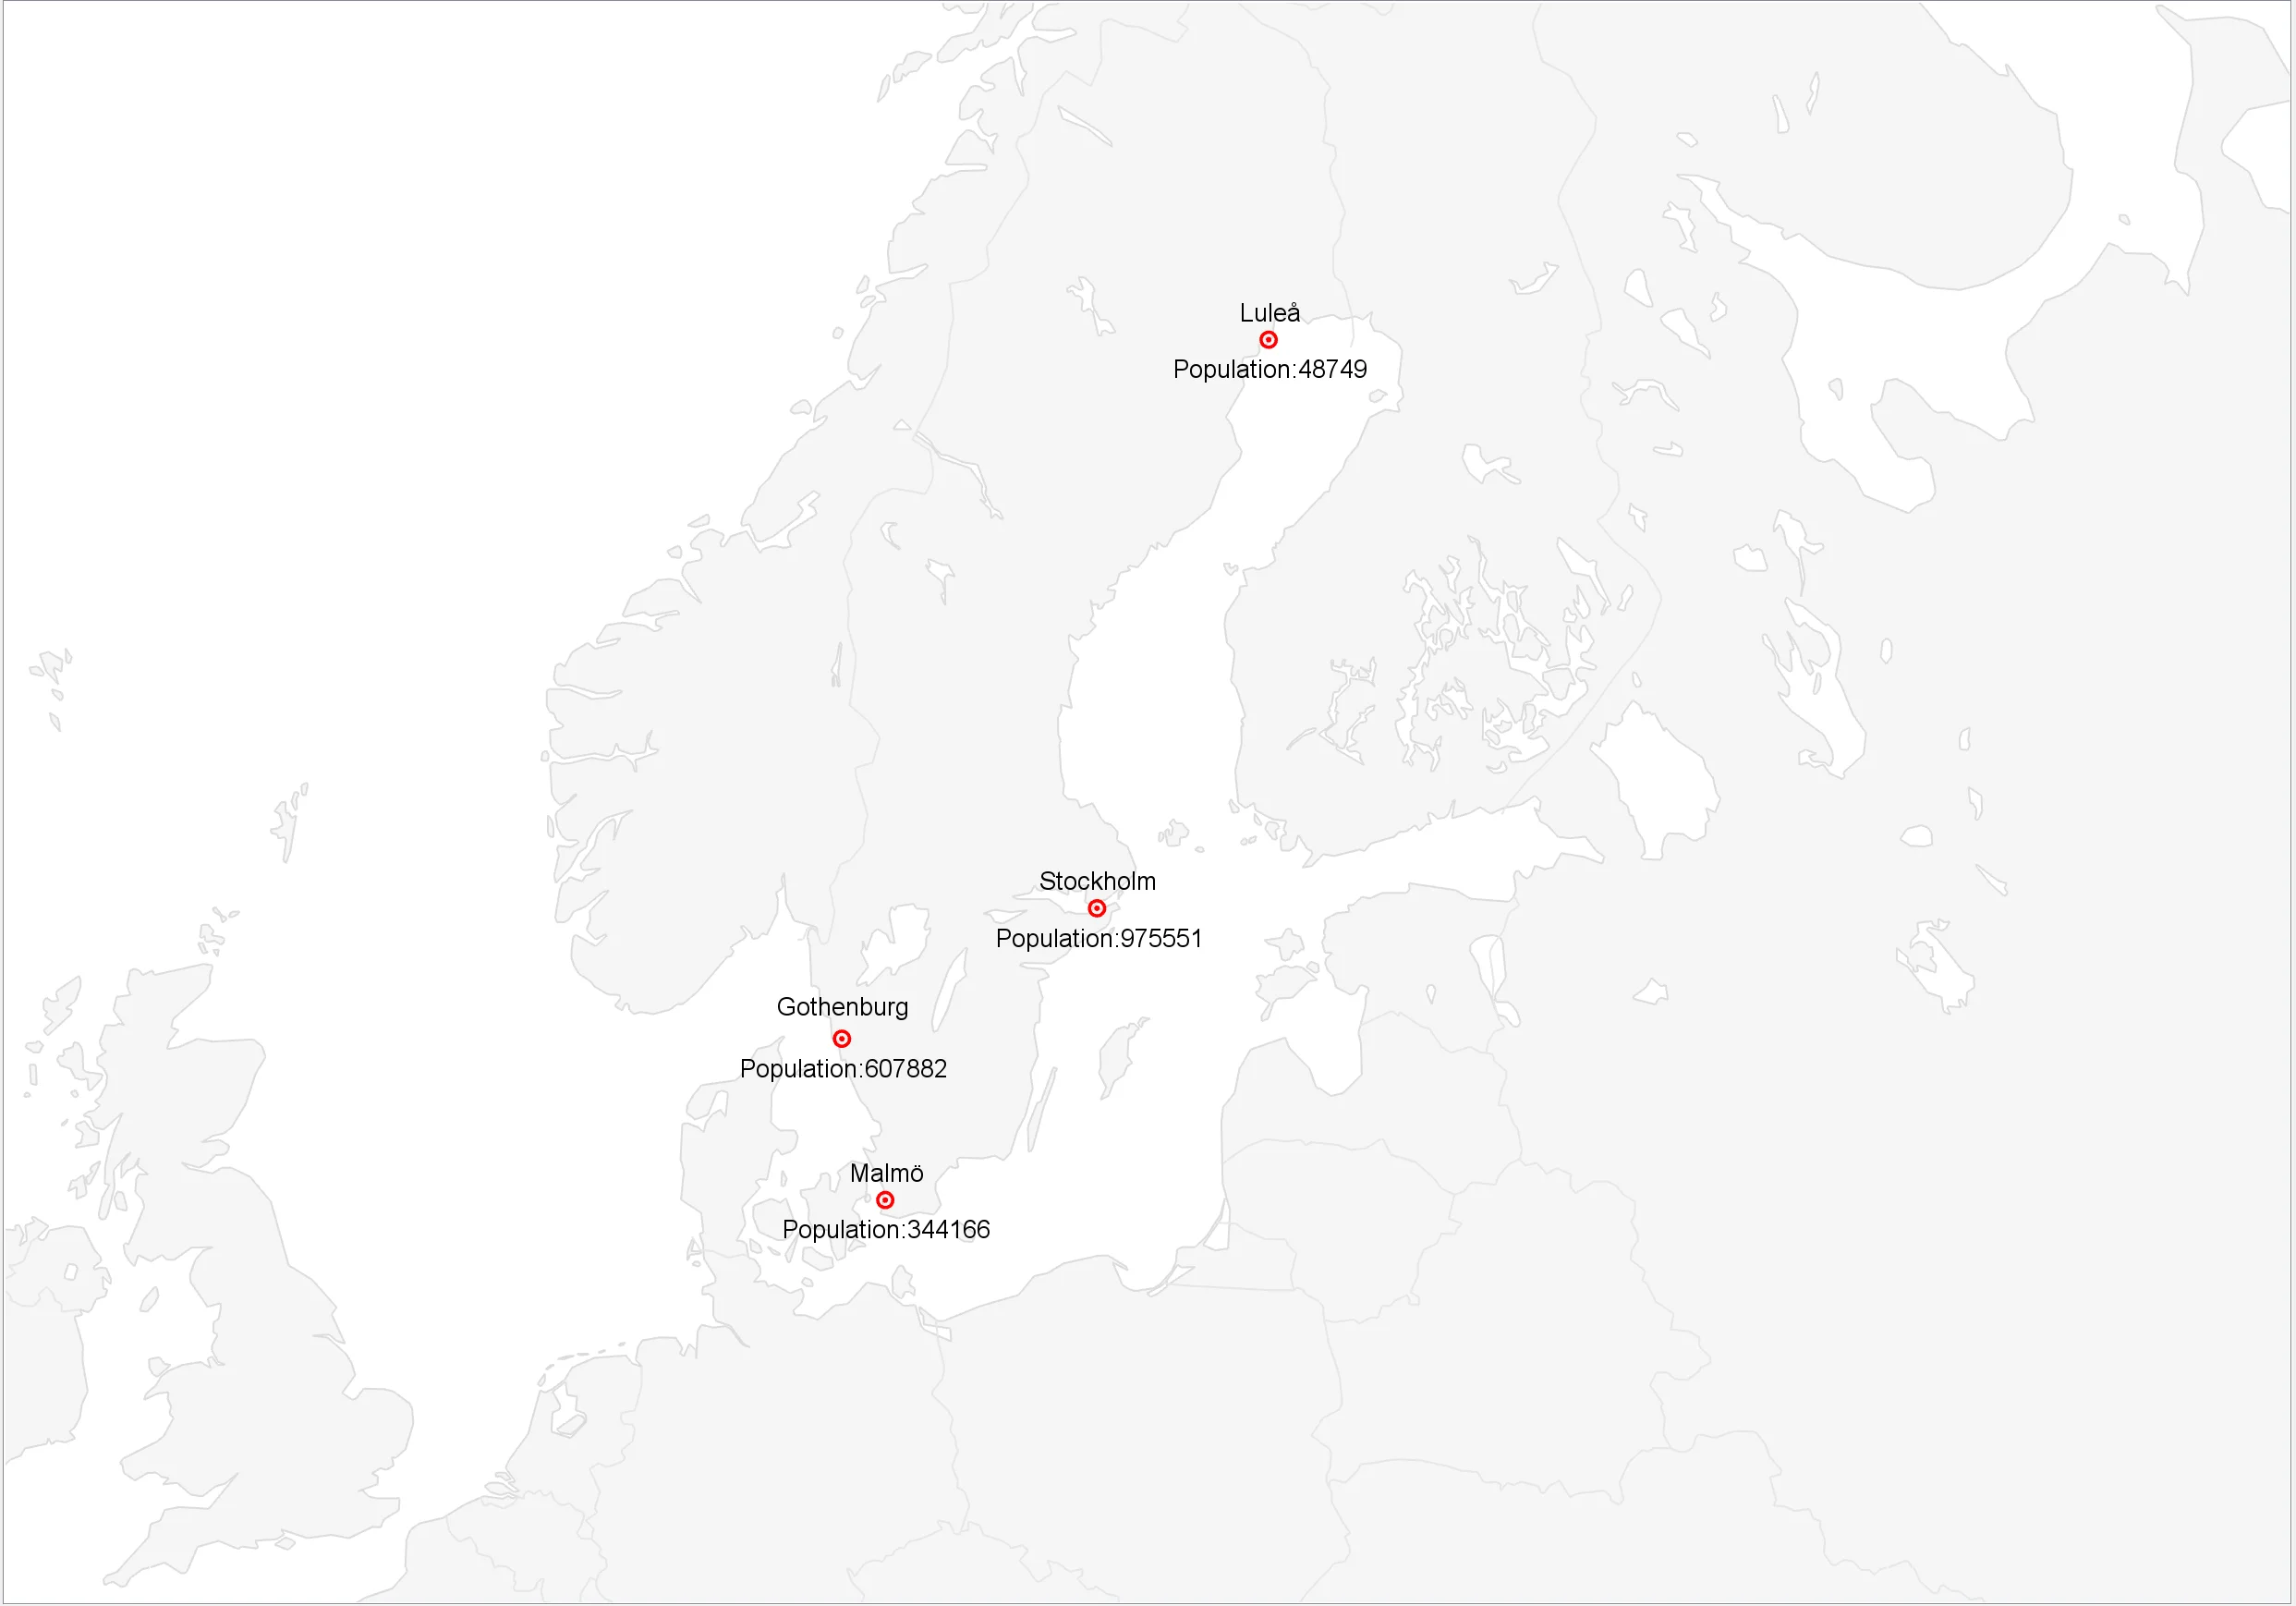
Learn how to add data overlays to a Carmenta Engine application. This guide covers adding spatial objects from application code, databases and proprietary data sources.
View Post