Next Post
Adding Data To A Carmenta Engine Application
Learn how to add data overlays to a Carmenta Engine application. This guide covers adding spatial objects from application code, databases and proprietary data sources.
View Post
This article aims to introduce the reader to the concept of MVVM (Model-View-ViewModel) as well as how one could utilize it to create better Carmenta Engine WPF applications. This will be done in three parts. First, we introduce the reader to the concept of the MVVM-pattern. Secondly, we showcase a standard C# WPF Carmenta Engine application, the HelloWorld sample. Finally, we rewrite the WPF Carmenta Engine application to comply with the MVVM-pattern. We will shortly discuss the benefits of using MVVM as your architectural structure.
Here is a zip-file with the source code and resources for the final product:
MVVM (Model-View-ViewModel) is a software architectural pattern that utilizes a binding technique to separate the development of the front-end GUI (Graphical-User-Interface) from the development of the backend logic or business logic. With this pattern, the backend can be (in most cases) completely isolated from the GUI dependencies which allows for easier testing and development/deployment of features and functionality.
The frontend is represented by the View layer, which in the case of WPF, is written using a markup language known as XAML.
The Model layer holds the business logic and the structure and consumption of backend data, commonly fetched from a server, database or local files.
The strength of the MVVM pattern lies within the ViewModel, sometimes known as Controller or Binder, which acts as a middleman between the View and the Model. There is no (or very limited) need for any large codebase in code-behind files which is the typical case for GUI subsystems where it is tightly coupled to the user interface itself. Instead, the code is split into the Model and ViewModel, where the Model handles the business rules and data while the ViewModel manages user interaction and presentation of the data in the View.
You do not always need to use a Model, a View-ViewModel combo is sufficient when implementing features or functionality that does not consume any outside data. The MVVM pattern is sometimes called MVB, Model-View-Binding, which emphasizes the important binding role of the ViewModel.
In more traditional GUI architypes, the view and its logic are separated using code-behind files. This split allowed two different developers to work together on one solution. One designer and one programmer. By splitting the implementation into two parts, the graphical part can be written for example using a markup language while the logical part remains to be implemented a regular programming language. The designer can more easily structure the design and use properties and events (commands/actions) implemented in the code-behind file. The initialization and termination of the GUI components are handled in the code-behind file.

The MVVM pattern seeks to create one additional degree of separation. The issue is that when accessing methods, event listeners or even trying to test any of the logic implemented in the code-behind file, there is a direct dependency on the GUI and its platform. Instead of writing the logic in the code-behind file, we can write it in more isolated and independent files. The ViewModel is only used as a binding tool, converting data objects into drawable objects and handling user input. This way, one could easily detach a ViewModel from the View when testing new functionality, running stress tests or regular unit tests. A simple mockup of the View (or the Model) would suffice. It is also a lot easier to switch out the platform used for the GUI (the View) or change the database used for the Model without having to rewrite all of the logic.
You could also isolate more of the code and the responsibilities of each GUI component by creating interfaces of all Models and ViewModels. The interfaces should list the properties that other ViewModels and Models should have access to, allowing for dependency injection, which in turn allows for separation of concerns (the ‘S’ in SOLID) with respect to the creation of objects and the use of these objects. In other words, someone else gets to decide which implementation of a dependency should be used. The result is a more loosely coupled codebase, where components have less kowledge of eachother and hence fewer reasons to change as a result of other components changing. Test code can also inject mockups that give the test control over any external factors, enabling unit testing.
Complex relationships between MVVM entities can allow for some advanced scenarios. A Model can be built using another Model as base and expose a new set of properties based on the same backend data. A ViewModel can use multiple different Models for various purposes and combine data from these into something useful for the user. A View can be composed of many other Views, leading to tree-structured user interfaces where responsibility for specific parts of the user interaction are delegated to smaller components, etc.
Test-driven development is a modern alternative way of developing software applications. Before implementing the program logic, you instead start by writing a set of test cases that cover all of the normal use cases as well as potential edge cases, bad user input etc. The idea is that once all the test cases have passed, the implementation is complete, robust and secure.
Traditionally, developers would start by implementing the logic and then write test cases that verify the main purpose of the logic. Shouldn’t this result in the same solution, why bother with writing the test cases first? By writing the test cases first, the developer’s focus is only to write sufficient code to cover the test cases, potentially leading to less code. The larger the codebase, the more difficult it is to maintain.
MVVM allows developers to use test-driven development when implementing ViewModels and Models. When the View is created for the window component, and a set of binding parameters exists, the developer can start by implementing test cases for how the View component should behave. Take, for example, a text field where the user inserts a path to a file. The developer can create a set of test cases simulating a user who inserts a correct or faulty path. When the test cases are successfully handled the developer can expect the GUI logic to be complete and correct. Just keep in mind that for GUI application, manual testing is often needed to assess cosmetic issues or other unexpected visual bugs.
When the desired end result is more of a moving target, test-first design can result in writing a lot of tests for functionality which later turn out to not be relevant, so be aware that it is not a silver bullet nor an obvious choice in all situations.
Before digging into the MVVM-pattern, we will begin by looking at the by now familiar Carmenta Engine Hello World WPF sample application. We will be taking a closer look at the sample and describe its structure and implementation.
WPF stands for Windows Presentation Foundation, a free open-source GUI subsystem similar to WinForms (C#), Swing (Java) and Qt (C++). WPF supports using a markup language for the GUI design development, rather than standard coding. This is done using XAML, Extensible Application Markup Language, which is a dialect of XML.
XAML allows the user to structure and instantiate application-based objects. The designer can write XML elements with attributes, that represent all of the objects, functionality and resources created by the programmer in the code-behind file. XAML functionality such as converters, commands and bindings help the designer to fully develop an interactive GUI, setting everything up smoothly for the programmer to complete in the code-behind files. This results in an elegant interface between the programmer and the designer. But there are flaws with the concept of code-behind files attached to the XAML files, which is partly corrected by the MVVM-pattern, as we will explore later on in this article.
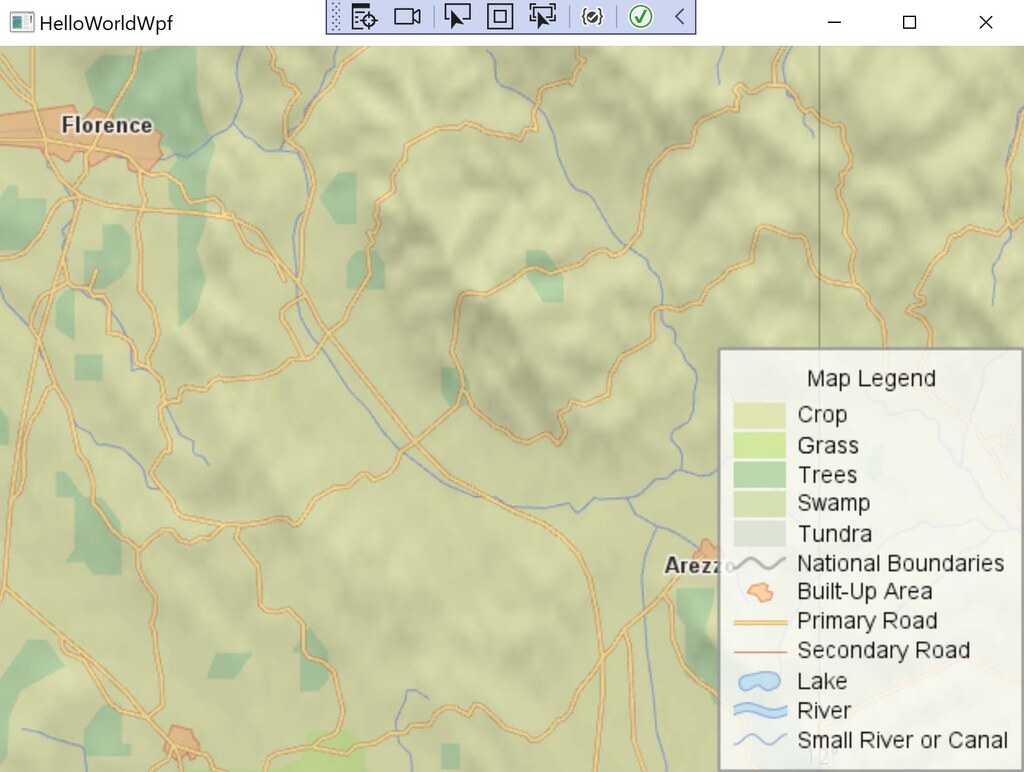
Included in the Carmenta Engine SDK are a set of application samples, multiple samples for each supported programming language and GUI subsystem. We will focus our attention on the simple HelloWorld WPF sample application.
As mentioned above, WPF classes are separated into two very different looking parts, the GUI XAML file and the code-behind C# class. The HelloWorld application consists of two WPF classes, AppWindow1
Every application has a starting point, from which the “main” function is called. In the Hello Word sample, the starting point is the App class. This WPF class consists of an App.xaml file and a code-behind file, App.xaml.cs, a C# class. For simplicity and to clarify the relationship between the two files, the extension .xaml is present in both filenames.
<Application x:Class="HelloWorldWpf.App"
    xmlns="http://schemas.microsoft.com/winfx/2006/xaml/presentation"
    xmlns:x="http://schemas.microsoft.com/winfx/2006/xaml"
    StartupUri="Window1.xaml" Startup="Application_Startup" Exit="Application_Exit">
    <Application.Resources>

    </Application.Resources>
</Application>
The App XAML file is very brief. It contains the main application’s resources. WPF uses namespaces that point towards resource databases using hyperlinks. Resources located at winfx/2006/xaml/presentation are in the default namespace while resources at winfx/2006/xaml use the namespace prefix x:
Our application resources are empty, for now, but this is where we could later put external resources like icon libraries, localization dictionaries for UI strings etc.
We set the application start up class to be the HelloWorldWpf.AppWindow1.xamlStartupExitApplication_StartupApplication_Exit
namespace HelloWorldWpf
{
    using System;
    using System.Collections.Generic;
    using System.Configuration;
    using System.Data;
    using System.Windows;

    /// <summary>
    /// Interaction logic for App
    /// </summary>
    public partial class App : Application
    {
        /// <summary>
        /// Initializes Carmenta Engine
        /// </summary>
        /// <param name="sender">The object that raised the event</param>
        /// <param name="args">The event data</param>
        private void Application_Startup(object sender, StartupEventArgs args)
        {
            try
            {
                // Initialize Carmenta Engine.
                Carmenta.Engine.Runtime.Initialize();
            }
            catch (Exception ex)
            {
                // Display error message from exception.
                MessageBox.Show(
                    ex.Message,
                    "HelloWorldWpf",
                    MessageBoxButton.OK,
                    MessageBoxImage.Error);
                Application.Current.Shutdown();
            }
        }

        /// <summary>
        /// Shuts down Carmenta Engine
        /// </summary>
        /// <param name="sender">The object that raised the event</param>
        /// <param name="args">The event data</param>
        private void Application_Exit(object sender, ExitEventArgs args)
        {
            Carmenta.Engine.Runtime.Shutdown();
        }
    }
}
Looking at the code-behind file, we construct a partial class AppApplicationStartupExit
In our startup class App, we set the startup GUI to Window1
<Window x:Class="HelloWorldWpf.Window1"
    xmlns="http://schemas.microsoft.com/winfx/2006/xaml/presentation"
    xmlns:x="http://schemas.microsoft.com/winfx/2006/xaml"
    xmlns:c="https://carmenta.com/engine/controls"
    Title="HelloWorldWpf" Height="480" Width="640" Loaded="Window_Loaded">
    <Grid>
        <c:MapControl Name="mapControl" Error="MapControl_Error" />
    </Grid>
</Window>
Window1.xaml does not look much more impressive than App.xaml. We have added one more namespace c:Loaded event is hooked up to a Window_Loaded event handler. We have set a title, height and width. Inside our window, we create a grid. The grid covers the entire window by default.
Inside the grid, we create a Carmenta Engine MapControl, which is located inside the Carmenta Engine WPF controls namespace, hence the use of the c:ErrorMapControl_Error
public Window1()
{
    this.InitializeComponent();
}

/// <summary>
/// Loads the map configuration when the application starts
/// </summary>
/// <param name="sender">The object that raised the event</param>
/// <param name="args">The event data</param>
private void Window_Loaded(object sender, RoutedEventArgs args)
{
    try
    {
        Carmenta.Engine.View view = LoadConfiguration("world_map.px");
        if (view != null)
        {
            // Set map control view and tool.
            this.mapControl.View = view;

            // Check if view is a 3D view
            if (view is Carmenta.Engine.GlobeView)
            {
                Carmenta.Engine.StandardTool3D tool = new Carmenta.Engine.StandardTool3D();
                this.mapControl.Tool = tool;

                Carmenta.Engine.StandardTouchTool3D touchTool = new Carmenta.Engine.StandardTouchTool3D();
                this.mapControl.TouchTool = touchTool;
            }
            else
            {
                Carmenta.Engine.StandardTool tool = new Carmenta.Engine.StandardTool();
                this.mapControl.Tool = tool;

                Carmenta.Engine.StandardTouchTool touchTool = new Carmenta.Engine.StandardTouchTool();
                this.mapControl.TouchTool = touchTool;
            }
        }
        else
        {
            MessageBox.Show(
                "No views found",
                "HelloWorldWpf",
                MessageBoxButton.OK,
                MessageBoxImage.Error);
            this.Close();
        }
    }
    catch (Exception ex)
    {
        // Display error message from exception.
        MessageBox.Show(
            ex.Message,
            "HelloWorldWpf",
            MessageBoxButton.OK,
            MessageBoxImage.Error);
        this.Close();
    }
}
Now we arrive at the part where most of the application code is written. The code-behind file for our window class will be quite large. It serves two purposes. First, to read a local Carmenta Engine configuration file, world_map.px, retrieve the Carmenta Engine View object and hook it up to the map control. Second, to instantiate tools (2D or 3D) and error handling for the map control.
When the window is loaded, we start off by retrieving the View object from within our Carmenta Engine configuration file. If it exists, we set our map control to show the retrieved Carmenta Engine View. Additionally, we set up map tools depending on whether the View object is of type 2D or 3D. Finally, we use message boxes to display errors if the View object could not be found or if the window could not be loaded correctly.
private void MapControl_Error(object sender, Carmenta.Engine.Controls.ErrorEventArgs args)
{
    // Disable view updates.
    if (this.mapControl.View != null)
    {
        this.mapControl.View.UpdateEnabled = false;
    }

    // Display error message.
    MessageBox.Show(
        args.Message,
        "HelloWorldWpf",
        MessageBoxButton.OK,
        MessageBoxImage.Error);

    // Mark the event as handled.
    args.Handled = true;
}

/// <summary>
/// Loads the map configuration
/// </summary>
/// <param name="fileName">The map configuration file name</param>
/// <returns>The first public view found in the map configuration</returns>
private static Carmenta.Engine.View LoadConfiguration(string fileName)
{
    // Load configuration file.
    Carmenta.Engine.Configuration configuration = new Carmenta.Engine.Configuration(fileName);

    // Get view from configuration.
    Carmenta.Engine.View view = null;
    foreach (string key in configuration.PublicNames)
    {
        view = configuration.GetPublicObject(key) as Carmenta.Engine.View;
        if (view != null)
        {
            break;
        }
    }

    return view;
}
To retrieve the View object from our configuration, we write a help method LoadConfigurationMapControl_Error event handler disables the View and displays a message box with information whenever an error has occurred.
To summarize, the App class serves as a starting point for our application. It starts up Carmenta Engine and sets Window1 as the startup GUI. Window1 contains a grid that holds a Carmenta Engine MapControl component. This component is found within the namespace for Carmenta Engine WPF controls.
When Window1 is being loaded, it attempts to retrieve a Carmenta Engine View object from a local Carmenta configuration, world_map.px. If such a View object exists, it is hooked up to the map control.
Additionally, the map control utilizes the Carmenta Engine Standard tools to interact with the View. The map control has an error event handler that disables the View and displays any error messages.
When the application is shut down, the App class shuts down Carmenta Engine and all the GUI components.
We have a total of 4 different files, two XAML files and their two associated C# classes. Most of the code is found within the C# class that holds the logic for the main window, Window1.xaml.cs.
Now if the programmer was to design a set of automatic tests, an example would be the case where Window1 consumes a faulty Carmenta configuration file, how would they go about it?
This is one of the problems of relying too heavily on code-behind files. Most of the code is located within the individual view components. It cannot be shared among other window components, and the code is not testable without mocking a complete UI-element.
If you were to write automatic tests this way, you’d quickly run into difficulties trying to mock the UI elements for each window element that needs testing. All of the components are tightly coupled. It would have been a lot easier to write tests if the logic and the UI elements were loosely coupled. Then you could write test cases that do not rely on inputs in the shape of UI elements, instead inputs could be either real backend or mockup data. This is one of the main strengths that comes with using MVVM. Lets see how it can be done next.
Now we will re-program the entire Hello World application utilizing the MVVM architectural structure. We will see how we can detach each component and get rid of the explicit GUI dependencies. Most of the code that was previously in the code-behind files will be moved to a new set of C# classes. We will gain complexity by having to deal with more files than before, but gain the flexibility of loosely coupled C# classes that do not depend directly on the UI elements themselves.
Note: We will leave the reader with one additional implementation at the end. We will add a pair of effect
sliders and a button on top of our map control, which will showcase the process of adding new features using the MVVM-pattern.

The MVVM sample is attached as a zip-file at the start of this article. The sample is built using the Community MVVM Toolkit library. It contains the necessary data binding functionality. The difficulty in MVVM lies in the binding technique that connects the Model to the ViewModel and the ViewModel to the View, so using a library for this purpose is a good choice.
Most of the communication between the Model-View-ViewModel is handled via PropertyChanged events, that propagate changes of values to objects displayed in the GUI. It is a lot easier to use a library that already has implemented most of this MVVM support logic.
We begin by observing the changes we need to make to the solution structure and the main application files. We have created four new folders, Interfaces, Model, ViewModel and Views. In these folders the respective type of files will be placed.
The goal is to turn the map control into a MVVM entity, which we will name Map. We add one C# class each in their respective folders: MapModel, MapViewModel and MapView. Additionally, one could create interfaces of the ViewModels and the Models which helps when mocking, bootstrapping and locking down parts of the code and methods. In this case we will create an interface for the MapModel, that will later be consumed by the MapViewModel.
<Application x:Class="CE_MVVM_Toolkit.App"
    xmlns="http://schemas.microsoft.com/winfx/2006/xaml/presentation"
    xmlns:x="http://schemas.microsoft.com/winfx/2006/xaml"
    Startup="Application_Startup" Exit="Application_Exit">
    <Application.Resources>

    </Application.Resources>
</Application>
Just like in the Hello World sample, we set the App class as the Application class and hook up StartupExit
public partial class App : Application
{
    /// <summary>
    ///     This application instance.
    /// </summary>
    public static new App Current => (App)Application.Current;

    private void Application_Startup(object sender, StartupEventArgs e)
    {
        Carmenta.Engine.Runtime.Initialize();

        MainWindowView mainWindowView = new MainWindowView
        {
            DataContext = new MainWindowViewModel()
        };

        Current.MainWindow = mainWindowView;

        mainWindowView.Show();
    }

    private void Application_Exit(object sender, ExitEventArgs e)
    {
        Carmenta.Engine.Runtime.Shutdown();
    }
}
The code-behind file for our App class remains mostly unchanged. We initialize Carmenta Engine on startup and shut it down on exit. However, we now create a MainWindowView
  <Window x:Class="CE_MVVM_Toolkit.MainWindowView"
        xmlns="http://schemas.microsoft.com/winfx/2006/xaml/presentation"
        xmlns:x="http://schemas.microsoft.com/winfx/2006/xaml"
        xmlns:d="http://schemas.microsoft.com/expression/blend/2008"
        xmlns:mc="http://schemas.openxmlformats.org/markup-compatibility/2006"
        xmlns:map="clr-namespace:CE_MVVM_Toolkit.Views.Map"
        mc:Ignorable="d"
        Title="CE_MVVM_Toolkit" Height="450" Width="800">
    <Grid>
        <map:MapView DataContext="{Binding MapViewModel}"
                     HorizontalContentAlignment="Stretch" VerticalContentAlignment="Stretch"
                     HorizontalAlignment="Stretch" VerticalAlignment="Stretch"/>
    </Grid>
</Window>
The MainWindowView serves as the entrypoint of our application. It creates instances of all our other View objects—just the MapView for now—and connects their respective ViewModels using the DataContext parameter. By creating a local WPF namespace map we can point towards our own Views.Map namespace where the View XAML files are declared.
public class MainWindowViewModel : BaseViewModel
{
    /// <summary>
    ///     Initializes the main application components and loads coordinators.
    /// </summary>
    public MainWindowViewModel()
    {
        MapModel mapModel = new MapModel();
        MapViewModel = new MapViewModel(mapModel);
    }

    /// <summary>
    ///     The map displayed in the main application.
    /// </summary>
    public MapViewModel MapViewModel { get; }
}
Inside the MainWindowViewModel, we need to assure that we have each ViewModel as public objects so that the View can find them and (in the darkness?) bind to them. We instantiate them once in our constructor and keep the references during runtime.
Note that it’s in the Model and ViewModel files that the Community MVVM Toolkit will be used. Each Model and ViewModel we implement will inherient from its observable base classes. They come with a built-in messaging system and a PropertyChanged event handling. This is great for us.
If we pause and look at our previous window1.xaml file, we notice that all of the logic for consuming our Carmenta configuration file is contained inside of the code-behind file window1.xaml.cs. Since we introduced the MainWindowView, we can see that there is no code-behind left in the MainWindowView.xaml.cs file.
All of the logic previously attached directly to the UI component will now be split into ViewModels. We will place the map control inside of the MapView and then write the code to load the Carmenta configuration file in the MapModel, right where it belongs—along with any other business logic.
Inside of our Window1.xaml file, we created our MapView element. It is important to highlight the separation of the main window (window1) and all of its underlying View elements (just the MapView for now). They are separate and exchangeable. They are loosely coupled in that sense. One could create a new MapViewVersion2, work on it in isolation, and attach it to the main window by doing a simple name change.
The map control will now be hosted inside MapView, next we will see how MapView is defined.
<UserControl x:Class="CE_MVVM_Toolkit.Views.Map.MapView"
             xmlns="http://schemas.microsoft.com/winfx/2006/xaml/presentation"
             xmlns:x="http://schemas.microsoft.com/winfx/2006/xaml"
             xmlns:mc="http://schemas.openxmlformats.org/markup-compatibility/2006"
             xmlns:d="http://schemas.microsoft.com/expression/blend/2008"
             xmlns:c="https://carmenta.com/engine/controls"
             mc:Ignorable="d"
             Loaded="OnMapViewLoaded"
             d:DesignHeight="450" d:DesignWidth="800">
    <Grid>
        <c:MapControl Name="MapControl"/>
        <Label Margin="10"
               HorizontalContentAlignment="Center"
               Content="{Binding NominalScale}"
               VerticalAlignment="Bottom"
               FontSize="15"
               FontFamily="Arial"
               Foreground="Black"/>
    </Grid>
</UserControl>
The MapView consists of a central grid. The grid holds the Carmenta Engine Map Control and a Label whose Content property we bind to NominalScale, a property that now needs to exist in the DataContext of the MapView (i.e the MapViewModel). The nominal scale will tell the user what zoom level they are currently at. We place it centered at the bottom of the screen.
public partial class MapView : UserControl
{
    /// <summary>
    /// Initializes a new instance of the <see cref="MapView"/> class
    /// </summary>
    public MapView()
    {
        this.InitializeComponent();
    }

    /// <summary>
    ///     Initial setup of the map control after the window has loaded.
    /// </summary>
    /// <param name="sender">The sender.</param>
    /// <param name="e">The event arguments.</param>
    private void OnMapViewLoaded(object sender, RoutedEventArgs e)
    {
        if (DataContext is MapViewModel mapViewModel)
        {
            MapControl.View = mapViewModel.View;
            MapControl.Tool = mapViewModel.Tool;
            MapControl.Error += mapViewModel.OnMapControlError;
            mapViewModel.PropertyChanged += MapViewModelOnPropertyChanged;
        }
    }

    private void MapViewModelOnPropertyChanged(object sender, PropertyChangedEventArgs e)
    {
        if (!(sender is MapViewModel mapViewModel))
        {
            return;
        }

        switch (e.PropertyName)
        {
            case "Tool":
                MapControl.Tool = mapViewModel.Tool;
                break;
        }
    }
}
Normally, in MVVM, the code-behind files are practically empty, but this is not the case for the MapView. This is because we need to interact with an external GUI component, the Carmenta Engine MapControl. Because we want GUI components like the MapControl to be isolated to the View layer, we also need to put the code to interact with it in the code-behind for the View.
Inside the MapView_Loaded event handler, which we attached to the window Loaded event in MapView.xaml, we want to set up the MapControl. We do this by extracting the MapViewModel from the DataContext property. Remember how, in MainWindowView.xaml, we set the DataContext of the MapView to the MapViewModel instance that is held by the MainWindowViewModel.
If the DataContext is a MapViewModel, we set MapControl.ViewView property, same for the tool. We also add a handler for the PropertyChanged event from the MapViewModel. In it, we check if it was the ToolMapControl.Tool
The MVVM-pattern defines the Model part as the layer of backend data and business logic. It is not always necessary to use a Model, a View-ViewModel combo is sometimes enough. In our case, we wish to load a Carmenta configuration file from disk and extract the View object, as well as a nominal scale value. This sounds like the perfect job for a Model layer, but to be able to easily implement Models, we need to lay a solid foundation to build upon.
using System.ComponentModel;

namespace CE_MVVM_Toolkit.Interfaces
{
    /// <summary>
    ///     This is the base model interface that should be used for all model classes.
    /// </summary>
    public interface IModel : INotifyPropertyChanged, INotifyPropertyChanging
    {
    }
}
The IModel interface describes the properties of a generic Model class. It is simply combining the INotifyPropertyChanged and INotifyPropertyChanging interfaces from the Community MVVM Toolkit into one handy package.
To collect all of the shared code for Models in one place, we will next add an abstract class that all future Models can extend. This will also let us add any extensions down the line that we want all of our Models to inherit.
using CE_MVVM_Toolkit.Interfaces;
using CommunityToolkit.Mvvm.ComponentModel;
using CommunityToolkit.Mvvm.Messaging;

namespace CE_MVVM_Toolkit.Models
{
    /// <summary>
    ///     This is the base class for all model objects. If this class is provided with an
    ///     <see cref="IMessenger" /> instance it will automatically register this class for receiving messages and provides a
    ///     property for the inherited classes to use the <see cref="IMessenger" />.
    /// </summary>
    public abstract class BaseModel : ObservableObject, IModel
    {
        /// <summary>
        ///     Creates the base model and registers to receive messages.
        /// </summary>
        /// <param name="messenger">The messenger to use for sending and receiving messages.</param>
        protected BaseModel(IMessenger messenger)
        {
            Messenger = messenger;
            Messenger?.RegisterAll(this);
        }

        /// <summary>
        ///     Creates the base model.
        /// </summary>
        protected BaseModel()
        {
        }

        /// <summary>
        ///     The <see cref="IMessenger" /> that is used for receiving and sending messages.
        /// </summary>
        protected IMessenger Messenger { get; }
    }
}
BaseModel implements IModel and extends the ObservableObject class from the MVVM Community Tolkit, which in turn supplies all the messaging and change propagation code.
Using IModel and BaseModel, we are now ready to start building the Model layer of our MVVM application.
public interface IMapModel : IModel
{
    View View { get; }

    double NominalScale { get; }
}
For interacting with the map, we define an IMapModel interface that exposes the two properties we need. It holds a NominalScale double, with public getter and setter to update its value, and a Carmenta.Engine.View
Importantly, we need to implement the IModel interface which extends the INotifyPropertyChanged interface. Previously we noted that the View communicates with the ViewModel using the DataContext binding. The Model communicates changes to the ViewModel using PropertyChanged events. In turn, the ViewModel communicates changes to the View utilizing its own PropertyChanged events, which we will see a bit later. Our property setters must raise the PropertyChanged event whenever they are changed.
internal class MapModel : BaseModel, IMapModel
{
    public View View { get; }

    public double NominalScale
    {
        get => View.NominalScale;
        set
        {
            if (value > 0.0 && Math.Abs(View.NominalScale - value) < double.Epsilon)
            {
                View.NominalScale = value;
                OnPropertyChanged();
            }
        }
    }

    public MapModel()
    {
        View view = LoadConfiguration("world_map.px");
        if (view != null)
        {
            // Store the view
            View = view;

            // Area Changed event
            View.AreaChanged += OnView_AreaChanged;
        }
    }

}
The implementation of the MapModel is rather short but efficient. We extend BaseModel, which gives us all the functionality for the data binding. In the constructor we call a help method used to load the View object from a Carmenta configuration file. If the view exists, we store it in our public View property.
We also hookup the AreaChanged event to the View_AreaChanged event handler. This event will be raised by the Carmenta Engine View whenever we pan or zoom the map.
We can extract the nominal scale value directly from the View. Here we see a typical implementation of a
MVVM property. In the getter, we return the value stored in the View. In the setter, we check if the new incoming value is okay and not the same as the current value, then we update View.NominalScale and call the OnPropertyChanged method. This method comes from the Community MVVM Toolkit library’s ObservableObject class, by way of BaseModel.
PropertyChanged events are raised for all kinds of properties, so to identify the specific property that has been changed the property name is used as the primary identifier. Commonly, you would send the name of the property to OnPropertyChanged method (using nameofNominalScale
private void OnView_AreaChanged(object sender, System.EventArgs e)
{
    OnPropertyChanged(nameof(NominalScale));
}

/// <summary>
/// Loads the map configuration
/// </summary>
/// <param name="fileName">The map configuration file name</param>
/// <returns>The first public view found in the map configuration</returns>
private static View LoadConfiguration(string fileName)
{
    // Load configuration file.
    Configuration configuration = new Configuration(fileName);

    // Get view from configuration.
    View view = null;
    foreach (string key in configuration.PublicNames)
         {
         view = configuration.GetPublicObject(key) as View;
         if (view != null)
         {
            break;
         }
    }
    return view;
}
The help method to retrieve the view from the Carmenta configuration file remains the same as in the original sample.
The OnView_AreaChanged event handler raises the PropertyChanged event with the implicit name NominalScale using the nameof method. The nominal scale could change if the user zooms in and out.
So far, we have seen how the View binds its controls to ViewModel properties using the DataContext property and how the Model raises PropertyChanged events whenever it has updated its data (or fetched new data).
Now we arrive at the heart of MVVM, the ViewModel layer. Its job is to forward data from the Model and
convert it into a form that is suitable for presentation to the user. As with the Model layer, we first need t lay some groundwork for the ViewModel layer.
using System.ComponentModel;

namespace CE_MVVM_Toolkit.Interfaces
{
    /// <summary>
    ///     This class is the base view model interface that should be used for all view model classes.
    /// </summary>
    public interface IViewModel : INotifyPropertyChanged, INotifyPropertyChanging
    {
    }
}
As with IModel, the IViewModel interface acts as a convenient package for the two messaging interfaces from the Community MVVM Toolkit, and as a vessel for any future additions we may need to make to all of our ViewModels.
using CE_MVVM_Toolkit.Interfaces;
using CommunityToolkit.Mvvm.ComponentModel;
using CommunityToolkit.Mvvm.Messaging;

namespace CE_MVVM_Toolkit.ViewModels
{
    /// <summary>
    ///     This is the base class for all view model objects. If this class is provided with an
    ///     <see cref="IMessenger" /> instance it will automatically register this class for receiving messages and provides a
    ///     property for the inherited classes to use the <see cref="IMessenger" />.
    /// </summary>
    public abstract class BaseViewModel : ObservableValidator, IViewModel
    {
        /// <summary>
        ///     Creates the base view model and registers to receive messages.
        /// </summary>
        /// <param name="messenger">The messenger to use for sending and receiving messages.</param>
        protected BaseViewModel(IMessenger messenger)
        {
            Messenger = messenger;
            Messenger?.RegisterAll(this);
        }

        /// <summary>
        ///     Creates the base view model.
        /// </summary>
        protected BaseViewModel()
        {
        }

        /// <summary>
        ///     The <see cref="IMessenger" /> that is used for receiving and sending messages.
        /// </summary>
        protected IMessenger Messenger { get; }
    }
}
The BaseViewModel abstract class implements the IVieWModel interface and extends ObservableValidator from the Community MVVM Toolkit for all of the messaging functionality. Going forward, all of our ViewModel implementations will extend BaseViewModel.
using Carmenta.Engine;
using CE_MVVM_Toolkit.Interfaces.Map;

namespace CE_MVVM_Toolkit.ViewModels.Map
{
    public class MapViewModel : BaseViewModel
    {
        private readonly IMapModel _mapModel;
        private ITool _tool;

        public MapViewModel(IMapModel mapModel)
        {
            _mapModel = mapModel;
            _mapModel.PropertyChanged += OnMapModel_PropertyChanged;

            Tool = new StandardTool();
        }

        public View View => _mapModel.View;

        /// <summary>
        ///     The tool currently attached to the map.
        /// </summary>
        public ITool Tool
        {
            get => _tool;
            private set => SetProperty(ref _tool, value);
        }

        public string NominalScale => "1 : " + _mapModel.NominalScale.ToString("N0");

        /// <summary>
        ///     Error handling for the map control.
        /// </summary>
        public void OnMapControlError(object sender, Carmenta.Engine.Controls.ErrorEventArgs e)
        {
            View.UpdateEnabled = false;
        }


        private void OnMapModel_PropertyChanged(object sender, System.ComponentModel.PropertyChangedEventArgs e)
        {
            switch (e.PropertyName)
            {
                case nameof(IMapModel.NominalScale):
                    OnPropertyChanged(nameof(NominalScale));
                    break;
            }
        }
    }
}
MapViewModel is the ViewModel that will let the GUI interact with the map and which allows the MapView to connect to the Carmenta Engine View that we previously loaded in the MapModel.
In the constructor we expect the MapModel as an argument, note that it is of type IMapModel. As mentioned previously, in some cases you leave out the Model layer and only create a View-ViewModel, but whenever a Model is present, it should be injected in the constructor—via interface—and stored as a private member. We use a private read only member in this instance, as we do not expect the Model to be changed in runtime.
We know that MapModel raises the PropertyChanged event whenever changes occur, so we attach MapViewModel’s MapModel_PropertyChanged event handler to the MapModel’s event.
All in all, we have three properties, View, Tool and NominalScale—remember these being used in MapView? The job of the ViewModel layer is to create data suitable for consumption in the View, so to find the right conversion, we observe what types are required by the MapView. We need to return an Engine.View and an Engine.ITool for the map control and a string for the nominal scale label.
The View is trivial since we only need to pass along the View stored within the MapModel.
For the Tool, we use a property with a private backing field and use SetProperty from the Community MVVM Toolkit to implement the setter. This gives us automatic PropertyChanged events if the new value differs from the old one. Remember how the MapView listens to PropertyChanged and changes the Engine.View.Tool property when the MapViewModel.Tool property has changed.
For the nominal scale, we convert the double into a string, using the ToString method with some number formatting, and perform a simple string formatting: 1:NominalScaleValue
In OnMapModel_PropertyChanged, we receive PropertyChangedEventArgs. We can use these to identify what property has been changed in the MapModel. Remember, whenever we raise the PropertyChanged event, we pass the name of the property. We check if it was the NominalScale that changed and act accordingly. We raise our own PropertyChanged event with our own NominalScale property name to pass this information on to the MapView. The MapView will receive this alert via its DataContext, which will trigger an update of the GUI. You always need to raise the PropertyChanged event to keep the View in sync with the ViewModel.
The application is now in a fully functional state, linking the GUI to the MapModel’s NominalScale property, via the MapViewModel. However, not much else is gained from this total overhaul, so read on to make things more interesting!
To conclude this article, we will walk through an example of adding new functionality within the MVVM framework. We want the user to be able to adjust the brightness and contrast of the map with sliders. For this, we will add a new View and some ViewModels and Models. We give this feature the implementation name BrightnessContrastEffects.
Carmenta has a base class called Effect with various effect implementations, BrightnessContrastEffect is one such implementation.
We will create a BrightnessContrastEffectsView, an BrightnessContrastEffectsModel, and a BrightnessContrastEffectsViewModel accordingly.
<UserControl x:Class="CE_MVVM_Toolkit.Views.Map.BrightnessContrastEffectsView"
             xmlns="http://schemas.microsoft.com/winfx/2006/xaml/presentation"
             xmlns:x="http://schemas.microsoft.com/winfx/2006/xaml"
             xmlns:mc="http://schemas.openxmlformats.org/markup-compatibility/2006"
             xmlns:d="http://schemas.microsoft.com/expression/blend/2008"
             mc:Ignorable="d"
             d:DesignHeight="300" d:DesignWidth="300" >
    <StackPanel Margin="10" VerticalAlignment="Center">
        <DockPanel VerticalAlignment="Center" Margin="10">
            <Label DockPanel.Dock="Left" FontWeight="Bold">Brightness:</Label>
            <Slider Name="BrightnessSlider" Value= "{Binding Brightness}"
                    Minimum ="0.0" Maximum="2.0" Width="200" TickPlacement="BottomRight" TickFrequency="0.1" IsSnapToTickEnabled="True"/>
        </DockPanel>
        <DockPanel VerticalAlignment="Center" Margin="10">
            <Label DockPanel.Dock="Left" FontWeight="Bold" Width="72">Contrast:</Label>
            <Slider Name="ContrastSlider" Value= "{Binding Contrast}"
                    Minimum ="0.0" Maximum="2.0" Width="200" TickPlacement="BottomRight" TickFrequency="0.1" IsSnapToTickEnabled="True"/>
        </DockPanel>
        <DockPanel VerticalAlignment="Center" Margin="10">
            <Button Width="auto" Height="20" HorizontalAlignment="Right"
                    Content="Set Random Values" Command="{Binding RandomValuesCommand}">
            </Button>
        </DockPanel>
    </StackPanel>
</UserControl>
We start off by implementation the BrightnessContrastEffectsView. We bind its DataContext to the BrightnessContrastEffectsViewModel. Remember, we need to update the MainWindowViewModel, to register the new classes the same way as we did with the MapViewModel. Create a new property that returns the current instance of the BrightnessContrastEffectsViewModel.
We create a StackPanel that holds two DockPanels, one with the label Brightness and one with the label Contrast. We bind their values respectively to Brightness and Contrast, two properties that need to exist in our BrightnessContrastEffectsViewModel, both of type double. We can add an additional DockPanel containing a button that we can use to set a random value. Binding MVVM buttons works a bit differently, instead of using the OnClickEvent directly, we bind a command to the Command property of the Button.
We do some additional styling on the sliders and labels until we are happy with the look.
<Window x:Class="CE_MVVM_Toolkit.MainWindowView"
        xmlns="http://schemas.microsoft.com/winfx/2006/xaml/presentation"
        xmlns:x="http://schemas.microsoft.com/winfx/2006/xaml"
        xmlns:d="http://schemas.microsoft.com/expression/blend/2008"
        xmlns:mc="http://schemas.openxmlformats.org/markup-compatibility/2006"
        xmlns:map="clr-namespace:CE_MVVM_Toolkit.Views.Map"
        mc:Ignorable="d"
        Title="CE_MVVM_Toolkit" Height="450" Width="800">
    <Grid>
        <map:MapView DataContext="{Binding MapViewModel}"
                     HorizontalContentAlignment="Stretch" VerticalContentAlignment="Stretch"
                     HorizontalAlignment="Stretch" VerticalAlignment="Stretch"/>

        <map:BrightnessContrastEffectsView DataContext="{Binding BrightnessContrastEffectsViewModel}"
                         Margin="10"
                         HorizontalContentAlignment="Left"
                         VerticalAlignment="Top" />

    </Grid>
</Window>
As mentioned before, in the MainWindowView we add a new view component with the DataContext bound to a public property of the associated ViewModel. The MapView will be drawn first with the BrightnessContrastEffectsView on top, placed in the top left corner. Remember that the MainWindowViewModel will hold instances of all the ViewModels used, so we need to do a quick update and add our BrightnessContrastEffectsViewModel.
public class MainWindowViewModel : BaseViewModel
{

    /// <summary>
    ///     Initializes the main application components and loads coordinators.
    /// </summary>
    public MainWindowViewModel()
    {
        MapModel mapModel = new MapModel();
        MapViewModel = new MapViewModel(mapModel);

        BrightnessContrastEffectsModel brightnessContrastEffectsModel = new BrightnessContrastEffectsModel();
        BrightnessContrastEffectsViewModel = new BrightnessContrastEffectsViewModel(brightnessContrastEffectsModel);

        mapModel.AddEffect(brightnessContrastEffectsModel);
    }

    /// <summary>
    ///     The map displayed in the main application.
    /// </summary>
    public MapViewModel MapViewModel { get; }

    /// <summary>
    ///     The effects.
    /// </summary>
    public BrightnessContrastEffectsViewModel BrightnessContrastEffectsViewModel { get; }
}
One problem that we tackle here already, is that the Effect is a property on the Engine View object. The MapModel holds a reference to the View, so we create a new method AddEffect inside MapModel to add our new effect. We introduce an interface, IEffectsModel, to prevent direct dependencies between MapModel and BrightnessContrastEffectsModel. Doing it this way, we have a more loosely coupled connection between them. Remember to use a Guard when manipulating the Engine View object, since this operation is not thread safe.
public void AddEffect(IEffectsModel effectModel)
{
    if (View.Effects.Contains(effectModel.Effect))
        return;
    using (new Guard())
    {
        View.Effects.Add(effectModel.Effect);
    }

    effectModel.PropertyChanged += (s, e) => View.Update();
}
Now it’s time to implement the logic. Like previously, we start with the Model layer and then we implement the ViewModel.
using Carmenta.Engine;

namespace CE_MVVM_Toolkit.Interfaces.Map
{
    public interface IEffectsModel : IModel
    {
        Effect Effect { get; }
    }
}
We begin with the model interface, which we base off of the IModel interface, to get that support for PropertyChanged messaging for our properties. We require one additional public property, Effect. It needs a public getter, to retrieve the Engine Effect object.
using Carmenta.Engine;
using CE_MVVM_Toolkit.Interfaces.Map;

namespace CE_MVVM_Toolkit.Models.Map
{
    using System;

    internal class BrightnessContrastEffectsModel : BaseModel, IEffectsModel
    {
        private readonly BrightnessContrastEffect _brightnessContrastEffect;

        public BrightnessContrastEffectsModel()
        {
            _brightnessContrastEffect = new BrightnessContrastEffect();
        }

        public Effect Effect => _brightnessContrastEffect;

        /// <summary>
        /// Brightness property, range [0.0, 2.0]
        /// </summary>
        public double Brightness
        {
            get => _brightnessContrastEffect.Brightness;
            set
            {
                if (value < 0.0 || value > 2.0)
                    throw new ArgumentOutOfRangeException(nameof(Brightness), value,
	                "Brightness must be between 0.0 and 2.0.");
                _brightnessContrastEffect.Brightness = value;
                OnPropertyChanged();
            }
        }

        /// <summary>
        /// Contrast property, range [0.0, 2.0]
        /// </summary>
        public double Contrast
        {
            get => _brightnessContrastEffect.Contrast;
            set
            {
	        if (value < 0.0 || value > 2.0)
		    throw new ArgumentOutOfRangeException(nameof(Contrast), value,
                        "Contrast must be between 0.0 and 2.0.");
                _brightnessContrastEffect.Contrast = value;
                OnPropertyChanged();
            }
        }
    }
}
BrightnessContrastEffectsModel extends the BaseModel abstract class, thus inheriting the property change messaging functionality, and also implements the IEffectsModel interface.
We define the IEffectsModel property Effect as an expression-bodied property with a private readonly backing field initialized in the constructor. Remember, inside MapModel, we recently added a method called AddEffect that connects IEffectsModel.Effect to the Engine.View. The BrightnessContrastEffectsModel.Effect returns a BrightnessContrastEffect, an implementation of the base class Effect, so our interface is satisfied by this.
Before moving on, we define two additional properties, Brightness and Contrast, both of type double. These are not mandated by the IEffects interface, but will be needed to control this specific effect implementation. As always, when a new value is set on our properties, after checking that it is within the acceptable range, we raise the PropertyChanged event, to tell anyone who listens that it’s time to update its associated value.
Now our EffectsModel is complete and we can move on to the ViewModel layer.
using CE_MVVM_Toolkit.Models.Map;
using CE_MVVM_Toolkit.Interfaces.Map;
using CommunityToolkit.Mvvm.Input;
using System;
using System.ComponentModel;
using System.Windows.Input;

namespace CE_MVVM_Toolkit.ViewModels.Map
{
    public class BrightnessContrastEffectsViewModel : BaseViewModel
    {
        private readonly BrightnessContrastEffectsModel _effectsModel;

        /// <summary>
        /// Constructor
        /// </summary>
        /// <param name="effectsModel">Dependency injected effects model</param>
        public BrightnessContrastEffectsViewModel(IEffectsModel effectsModel)
        {
            //Check if the incoming effect is of type brightness+contrast
            if (effectsModel is BrightnessContrastEffectsModel brightnessContrastEffectsModel) _effectsModel = brightnessContrastEffectsModel;
            else throw new ArgumentException("effectsModel need to be of type EffectsModel");
            effectsModel.PropertyChanged += OnEffectsModel_PropertyChanged;
            RandomValuesCommand = new RelayCommand(RandomValuesCommandHandler);
        }

        private void OnEffectsModel_PropertyChanged(object sender, PropertyChangedEventArgs e)
        {
            if(e.PropertyName.Equals(nameof(Brightness)) ||
               e.PropertyName.Equals(nameof(Contrast))){
                OnPropertyChanged(e.PropertyName);
            }
        }

        /// <summary>
        /// Brightness property, range [0.0, 2.0]
        /// </summary>
        public double Brightness
        {
            get => _effectsModel.Brightness;
            set => _effectsModel.Brightness = value;
        }

        /// <summary>
        /// Contrast property, range [0.0, 2.0]
        /// </summary>
        public double Contrast
        {
            get => _effectsModel.Contrast;
            set => _effectsModel.Contrast = value;
        }

        public ICommand RandomValuesCommand { get; }

        /// <summary>
        /// Sets a random value for contrast and brightness.
        /// Values are between 0.0 and 2.0.
        /// </summary>
        private void RandomValuesCommandHandler()
        {
            Random rn = new();
            Brightness = rn.NextDouble() * 2;
            Contrast = rn.NextDouble() * 2;
        }
    }
}
The final part is the EffectsViewModel. The constructor will take the IEffectsModel and store it as a private member if and only if its implementation is of type BrightnessContrastEffectModel. Since the Contrast and Brightness values are already of type double, which is what the BrightnessContrastEffectsView needs to bind to, there is no need to do any conversions here. Simply create two public properties, whose names match to the ones bound on the View and return the values directly from the model.
Notice how there is no OnPropertyChanged call in the setters for these properties? That is because the event is being raised in the Model class’s setters for Brightness and Contrast anyway and is simply allowed to bubble up through the ViewModel, via..
OnEffectsModel_PropertyChanged, an event handler that listens to PropertyChanged events raised
by the Model. If they concern Brightness or Contrast, we raise PropertyChanged inside the ViewModel as well to propogate the changes all the way to BrightnessContrastEffectView.
To handle button commands, we use the built in RelayCommand from the Community MVVM Toolkit. A RelayCommand is an ICommand implementation, which when invoked will call the method, delegate or lambda that it was constructed with. We define a public ICommand with the name of the command we bound to the button (RandomValueClickEvent). Then in our constructor, initialize it to a new RelayCommand and pass in a method. Finally, in the method for the command we set a random value for Brightness and Constrast.
Now our implementation is complete. We have a map control that covers the entire window, with a nominal scale indicator at the bottom and two sliders in the top left corner to control the brightness and contrast of the map rendering. Clicking the button Set Random Values will set the two controls to random valid values, the effects of which are immediately reflected in the map.
In this article we have refactored a small application using Carmenta Engine into a MVVM architecture, showing how to isolate the Carmenta Engine MapControl from the GUI layer and exploring how the MVVM concept separates user interaction and presentation logic (such as the text for the nominal scale indicator) from the data (the nominal scale value on the Carmenta Engine View).
We also showed how additional functionality can be added in a MVVM application, again wrapping data entities in the shape of Effects objects in a Model class, keeping user interaction code like the random values button handler in the ViewModel layer. This example also showed how interfaces can be used to achieve a loosely coupled implementation that allows some classes to be unit tested (more can be done here, see below!).
Here are some additional potential improvements that we leave up to you to consider:
Learn how to add data overlays to a Carmenta Engine application. This guide covers adding spatial objects from application code, databases and proprietary data sources.
View Post
In this article, our basic QtQuick application will be extended with a service component to share a common feature overlay with other clients, synchronized in real-time.
View Post