Next Post
Retrieving Features from Operator Chains in Code
Learn how to call GetFeatures on Carmenta Engine operators to retrieve processed feature data directly in your application code using C#.
View PostSituations can happen where multiple features overlap with each other, which can be tricky to interact with a specific element. The example below showcases a tactical symbol cluster:
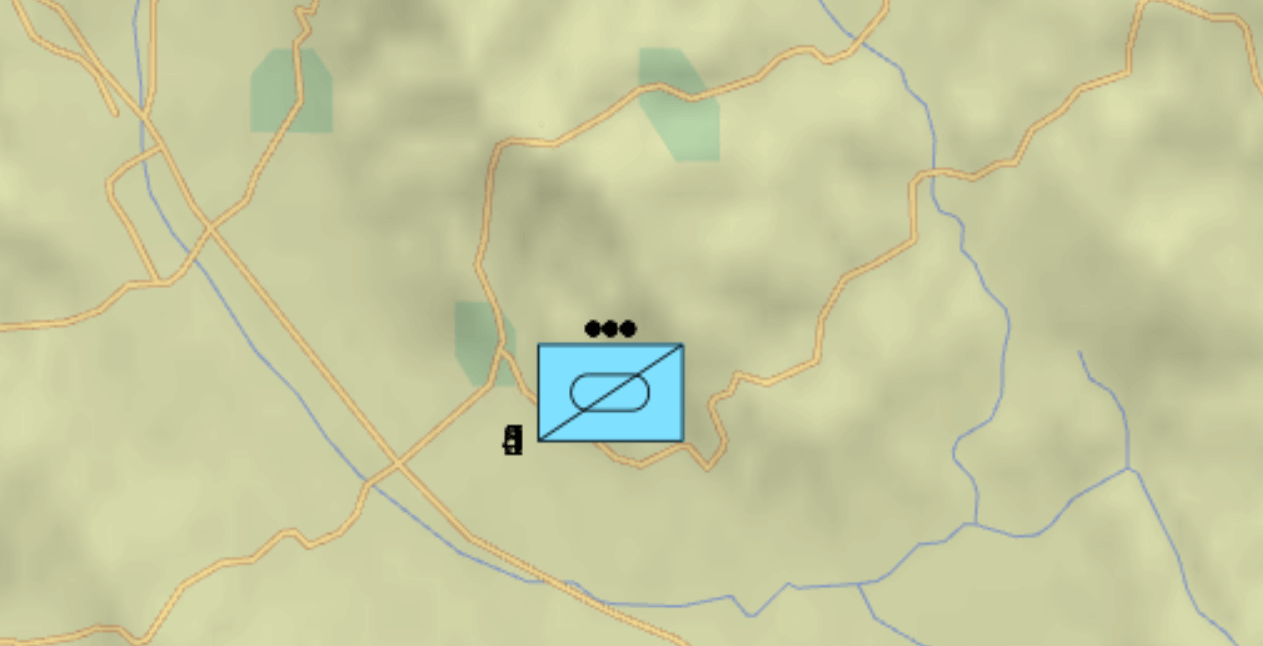
While Carmenta Engine does not provide native functions to perform the decluster, this article aims to present a solution by implementing a custom tool. A sample application in C# will be provided with this article.
In this article, you will learn how to:
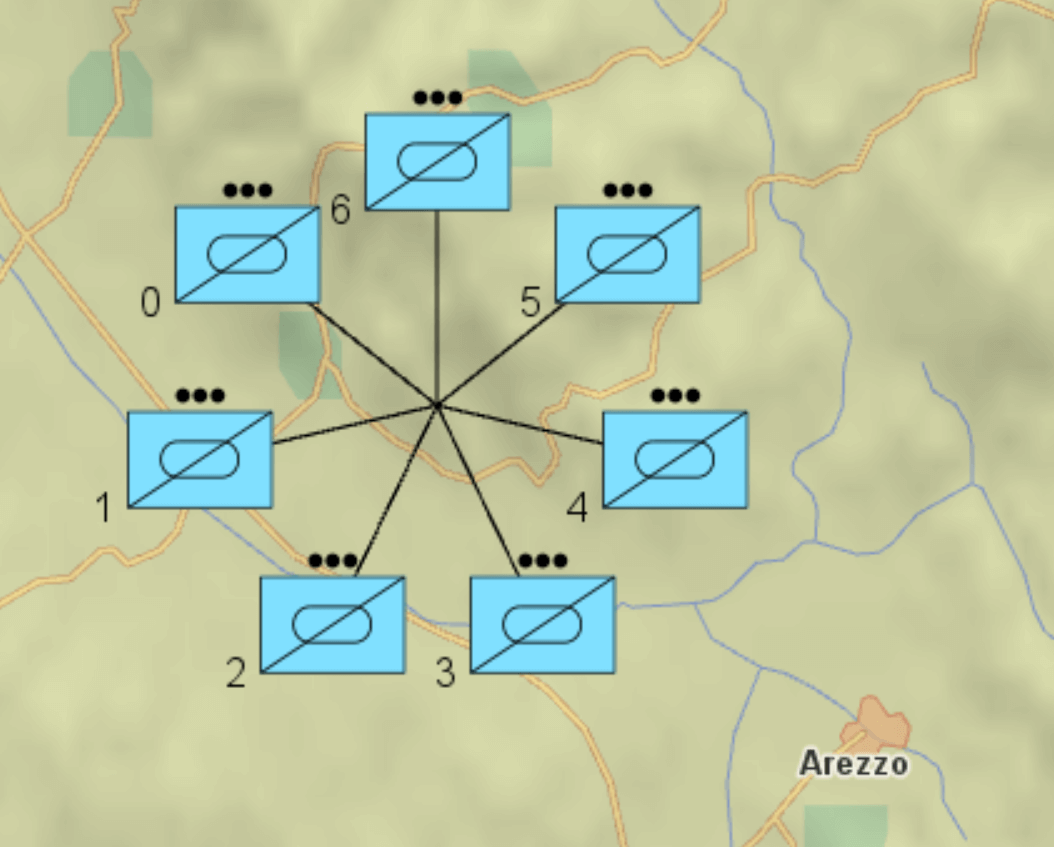
This tool’s goal is to identify which features are part of the cluster and visualize the spread around their initial position:
A custom tool is a class inheriting from StandardTool or StandardTouchTool, it can be a way to solve a problem when the generic implementation is not enough. Not all functions need to be overridden, in our case, only OnConnect, OnMouseDoubleClick, OnMouseUp as well as use Interacting event.
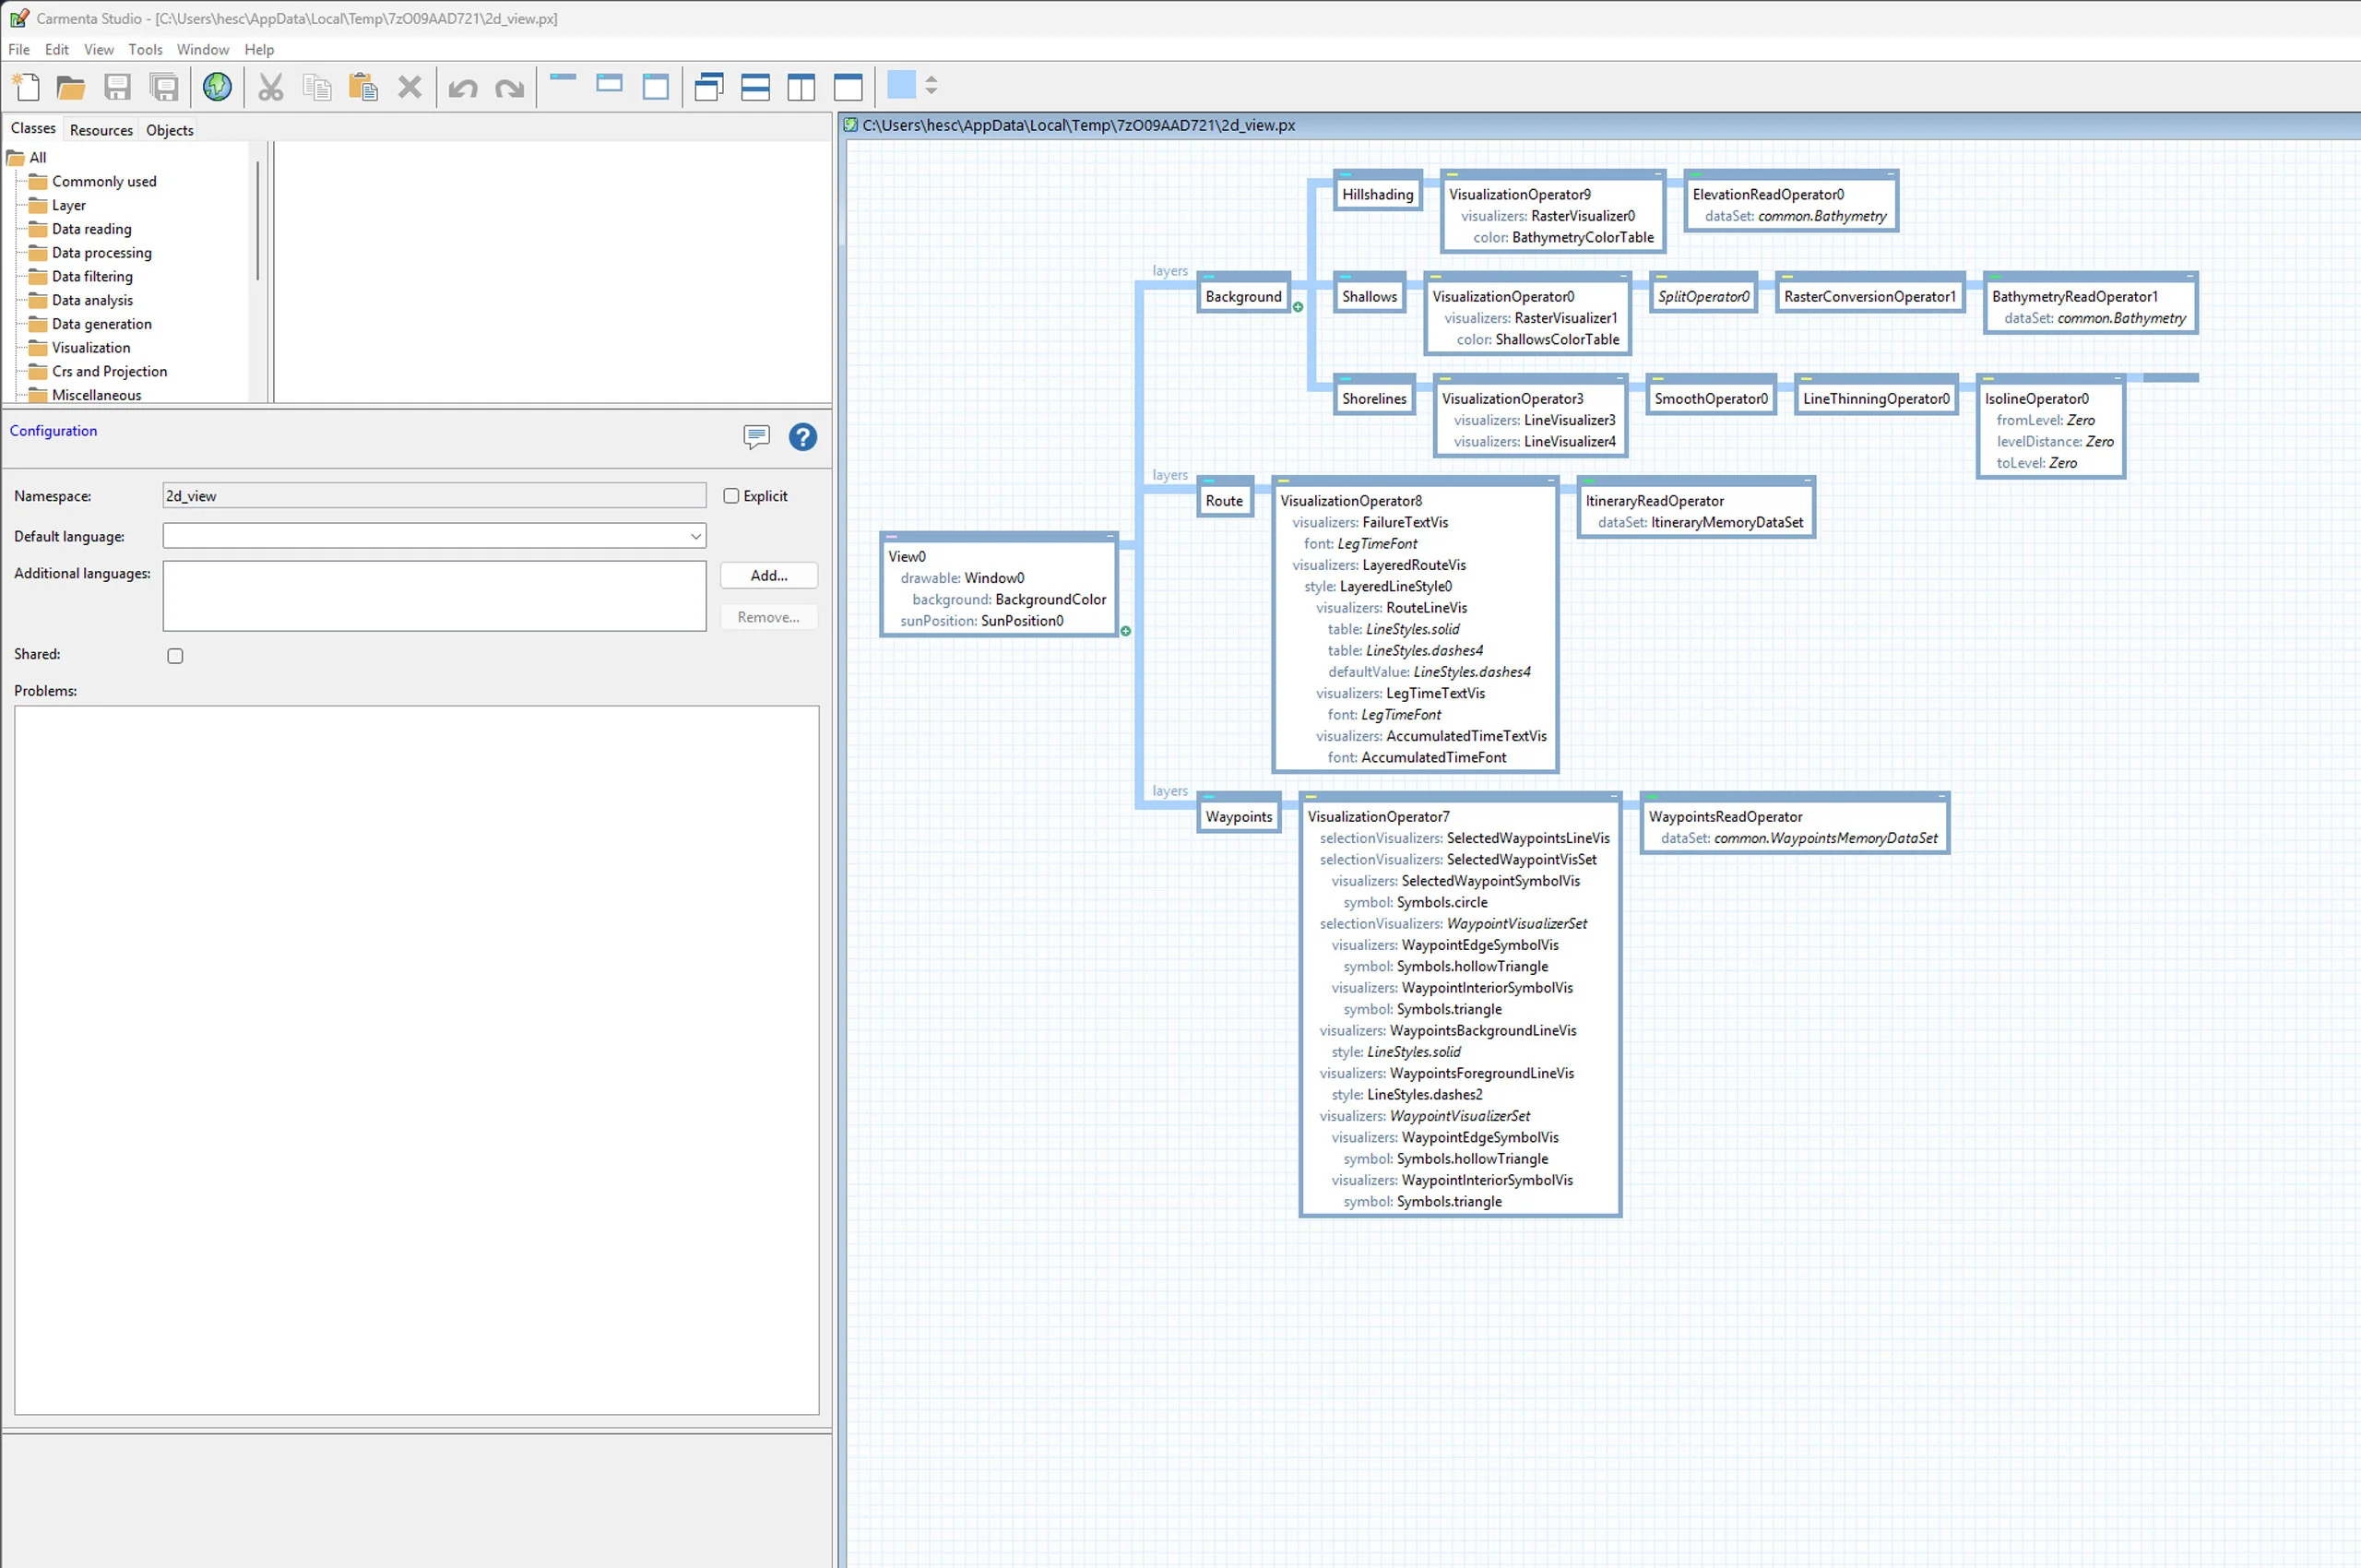
OnConnect is called when the tool is connected to a MapControl through mapControl.Tool = MyTool. We override it to access our DeclusteredDataSet inside the tool.
public override void OnConnect(
    System.Object control,
    View view)
{
    _view = view;

    _declusteredDataset = _view.FindChildObject("DeclusteredDataSet") as MemoryDataSet;
    base.OnConnect(control, view);
}
OnMouseDoubleClick is overridden and will perform most of the work to identify and spread the cluster. Code will be explained in the section below.
OnMouseUp will cancel the spread and visualize the stack back again. Cancellation is done when WhatsAt returns an empty list.
public override bool OnMouseUp(MouseButtons button, int x, int y, bool shift, bool ctrl, bool alt)
{
    if (_view.WhatsAt(x, y, DeclusteringPointRadius).Count == 0)
    {
        ClearDecluster(true);
    }

    return base.OnMouseUp(button, x, y, shift, ctrl, alt);
}
Interacting needs to be implemented to update _hasMultiplesFeatures, the rest of the function is optional. In our sample, we visualize leadlines, which are line geometry features. We don’t want to interact with them therefore we implement the event to filter AllowSelect.
private void OnInteracting(object sender, InteractingEventArgs args)
{
    foreach (var interaction in args.FeatureInteractions)
    {
        var feature = _declusteredDataset.GetFeature(interaction.Id);
        if (feature != null && feature.GeometryType == GeometryType.Line)
        {
            interaction.AllowSelect = false;
        }
    }

    _hasMultiplesFeatures = _view.WhatsAt(args.X, args.Y, DeclusteringPointRadius).Count(i => i.SourceFeature.GeometryType == GeometryType.Point) > 1;
}
Each time the base implementation is called to apply generic Carmenta tool behaviour.
The work is done in OnMouseDoubleClick override. To identify a cluster we use WhatsAt function. Using DeclusteringPointRadius allows you to control the area to search around the specified coordinate (x,y). While the value of DeclusteringPointRadius can be adjusted, keep in mind a bigger value will possibly add unwanted features to be unstacked and a smaller value may miss some.
var featuresHovered = new List<Feature>();
_view.WhatsAt(x, y, DeclusteringPointRadius).ToList().ForEach((item) =>
{
    if (!featuresHovered.Contains(item.SourceFeature))
        featuresHovered.Add(item.SourceFeature);
});
Hint: Layers need to be selectable in order for the features to be seen in WhatsAt call.
After the stack is found, on each feature 2 attributes are added:
featuresHovered.ForEach((feature) =>
{
    if (feature != null && feature.GeometryType == GeometryType.Point)
    {
        using (Guard g = new Guard(MemoryDataSet.GetDataSetById(feature.Id.DataSetId) as MemoryDataSet))
        {
            feature.Attributes["IsStacked"] = true;
            feature.Attributes["IsVisible"] = false;
        }

        _stackedFeatures.Add(feature);
    }
});
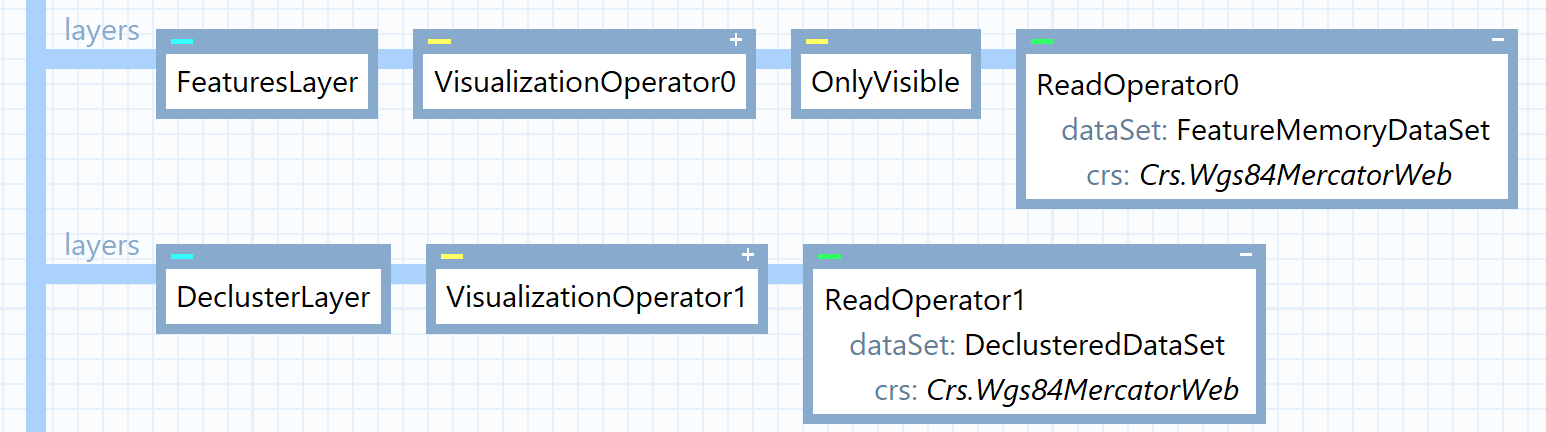
These attributes are necessary to hide the cluster while we display the spread. Declustered features are visualized in another layer:
The goal is to spread the features around their initial position and visualized the result in a new layer. The spread is done by calculating a new position using PointAlongRay2d function, below part of the function calculating the spread point (full function is available in the sample application):
private class FeatureClusterInfo
{
    public Feature Feature { get; set; }
    public double DistanceToCenter { get; set; }
}
List<FeatureClusterInfo> clusterInfos = new List<FeatureClusterInfo>();

foreach (var f in cluster)
{
    FeatureClusterInfo clusterInfo = new FeatureClusterInfo
    {
        Feature = f,
        DistanceToCenter = defaultLength
    };

    clusterInfos.Add(clusterInfo);
}

double spreadAngle = clusterInfos.Count();
for (int i = 0; i < clusterInfos.Count; i++)
{
    var currentElement = clusterInfos[i];

    // find destination length
    double length = currentElement.DistanceToCenter;

    // find a direction to spread the feature from the cluster
    double direction = i * (360.0 / spreadAngle);

    // calculate destination point by projecting from the cluster center
    // along the calculated direction at the specified distance
    Point endPoint = currentElement.Feature.Crs.PointAlongRay2d(currentElement.Feature.GetGeometryAsPoint().Point, direction, length, LineType.GreatCircleApprox);

    // add a leadline to show where the feature originated from
    Feature leadLine = new(new LineGeometry() { Points = { currentElement.Feature.GetGeometryAsPoint().Point, endPoint } }, currentElement.Feature.Crs);
    leadLine.Attributes.Add("IsLeadLine", true);
    result.Add(leadLine);

    // create a new feature at destination location
    Feature feature = new Feature(new PointGeometry(endPoint), currentElement.Feature.Crs, currentElement.Feature.Attributes.Clone() as AttributeSet);
    feature.Attributes["sourceFeature"] = Convert.ToString(currentElement.Feature.Id.DataSetId) + "/" + Convert.ToString(currentElement.Feature.Id.FeatureId);
    result.Add(feature);
}
The length and direction can be adjusted to the needs, the sample spreads features equally around the original location. The leadline is not mandatory, it allows visualization of where the feature originated from.
sourceFeature attribute is added in order to identify the source feature. It is useful if the application needs to perform operations on selected features such as opening a new UI or displaying analysis…
Lastly, we add the result into a new dataset, in our case _declusteredDataset:
var decluster = ProcessCluster(_stackedFeatures);
using (Guard g = new Guard(_declusteredDataset))
{
    _declusteredDataset.Clear();
    decluster.ToList().ForEach(f => _declusteredDataset.Insert(f));
}
When the features are spread, it can be interesting to still be able to interact with the source feature. We can do so using SelectionChanged event from view and manipulate the selection and select the feature from the cluster instead.
First, listen to the event:
view.SelectionChanged += OnSelectionChanged;
Then, the function would be like that:
private void OnSelectionChanged(object sender, EventArgs e)
{
    if (mapControl.View.GetSelectedIds().Count == 1)
    {
        Id source = _declusterisationTool.GetSourceFeature(mapControl.View.GetSelectedIds().First());

        if (source != default(Id))
        {
            _declusterisationTool.ClearDecluster(true);
            mapControl.View.Select(source, SelectMode.Replace);
        }
        else
        {
            // Selected a feature not in the _declusteredDataset
        }
    }
}
GetSourceFeature function parses the sourceFeature attribute to reconstruct the Id which will be used with Select. The result is that the selected feature from the stack appears on top and is selected.
To verify your declustering tool works correctly:
Expected Result: Features spread smoothly when double-clicked, and return to their cluster when you click elsewhere on the map.
Today we have learned how a custom tool, in complement of the default implementation of StandardTool, can solve a user problem. Implementing a custom tool can be a solution for many cases. While our sample only explore the StandardTool (Mouse interactions in 2D map) it is also possible using StandardTouchTool and their 3D counterparts.
More information about Standard Tool and Standard Touch Tool for the different interactions possible.
Learn how to call GetFeatures on Carmenta Engine operators to retrieve processed feature data directly in your application code using C#.
View Post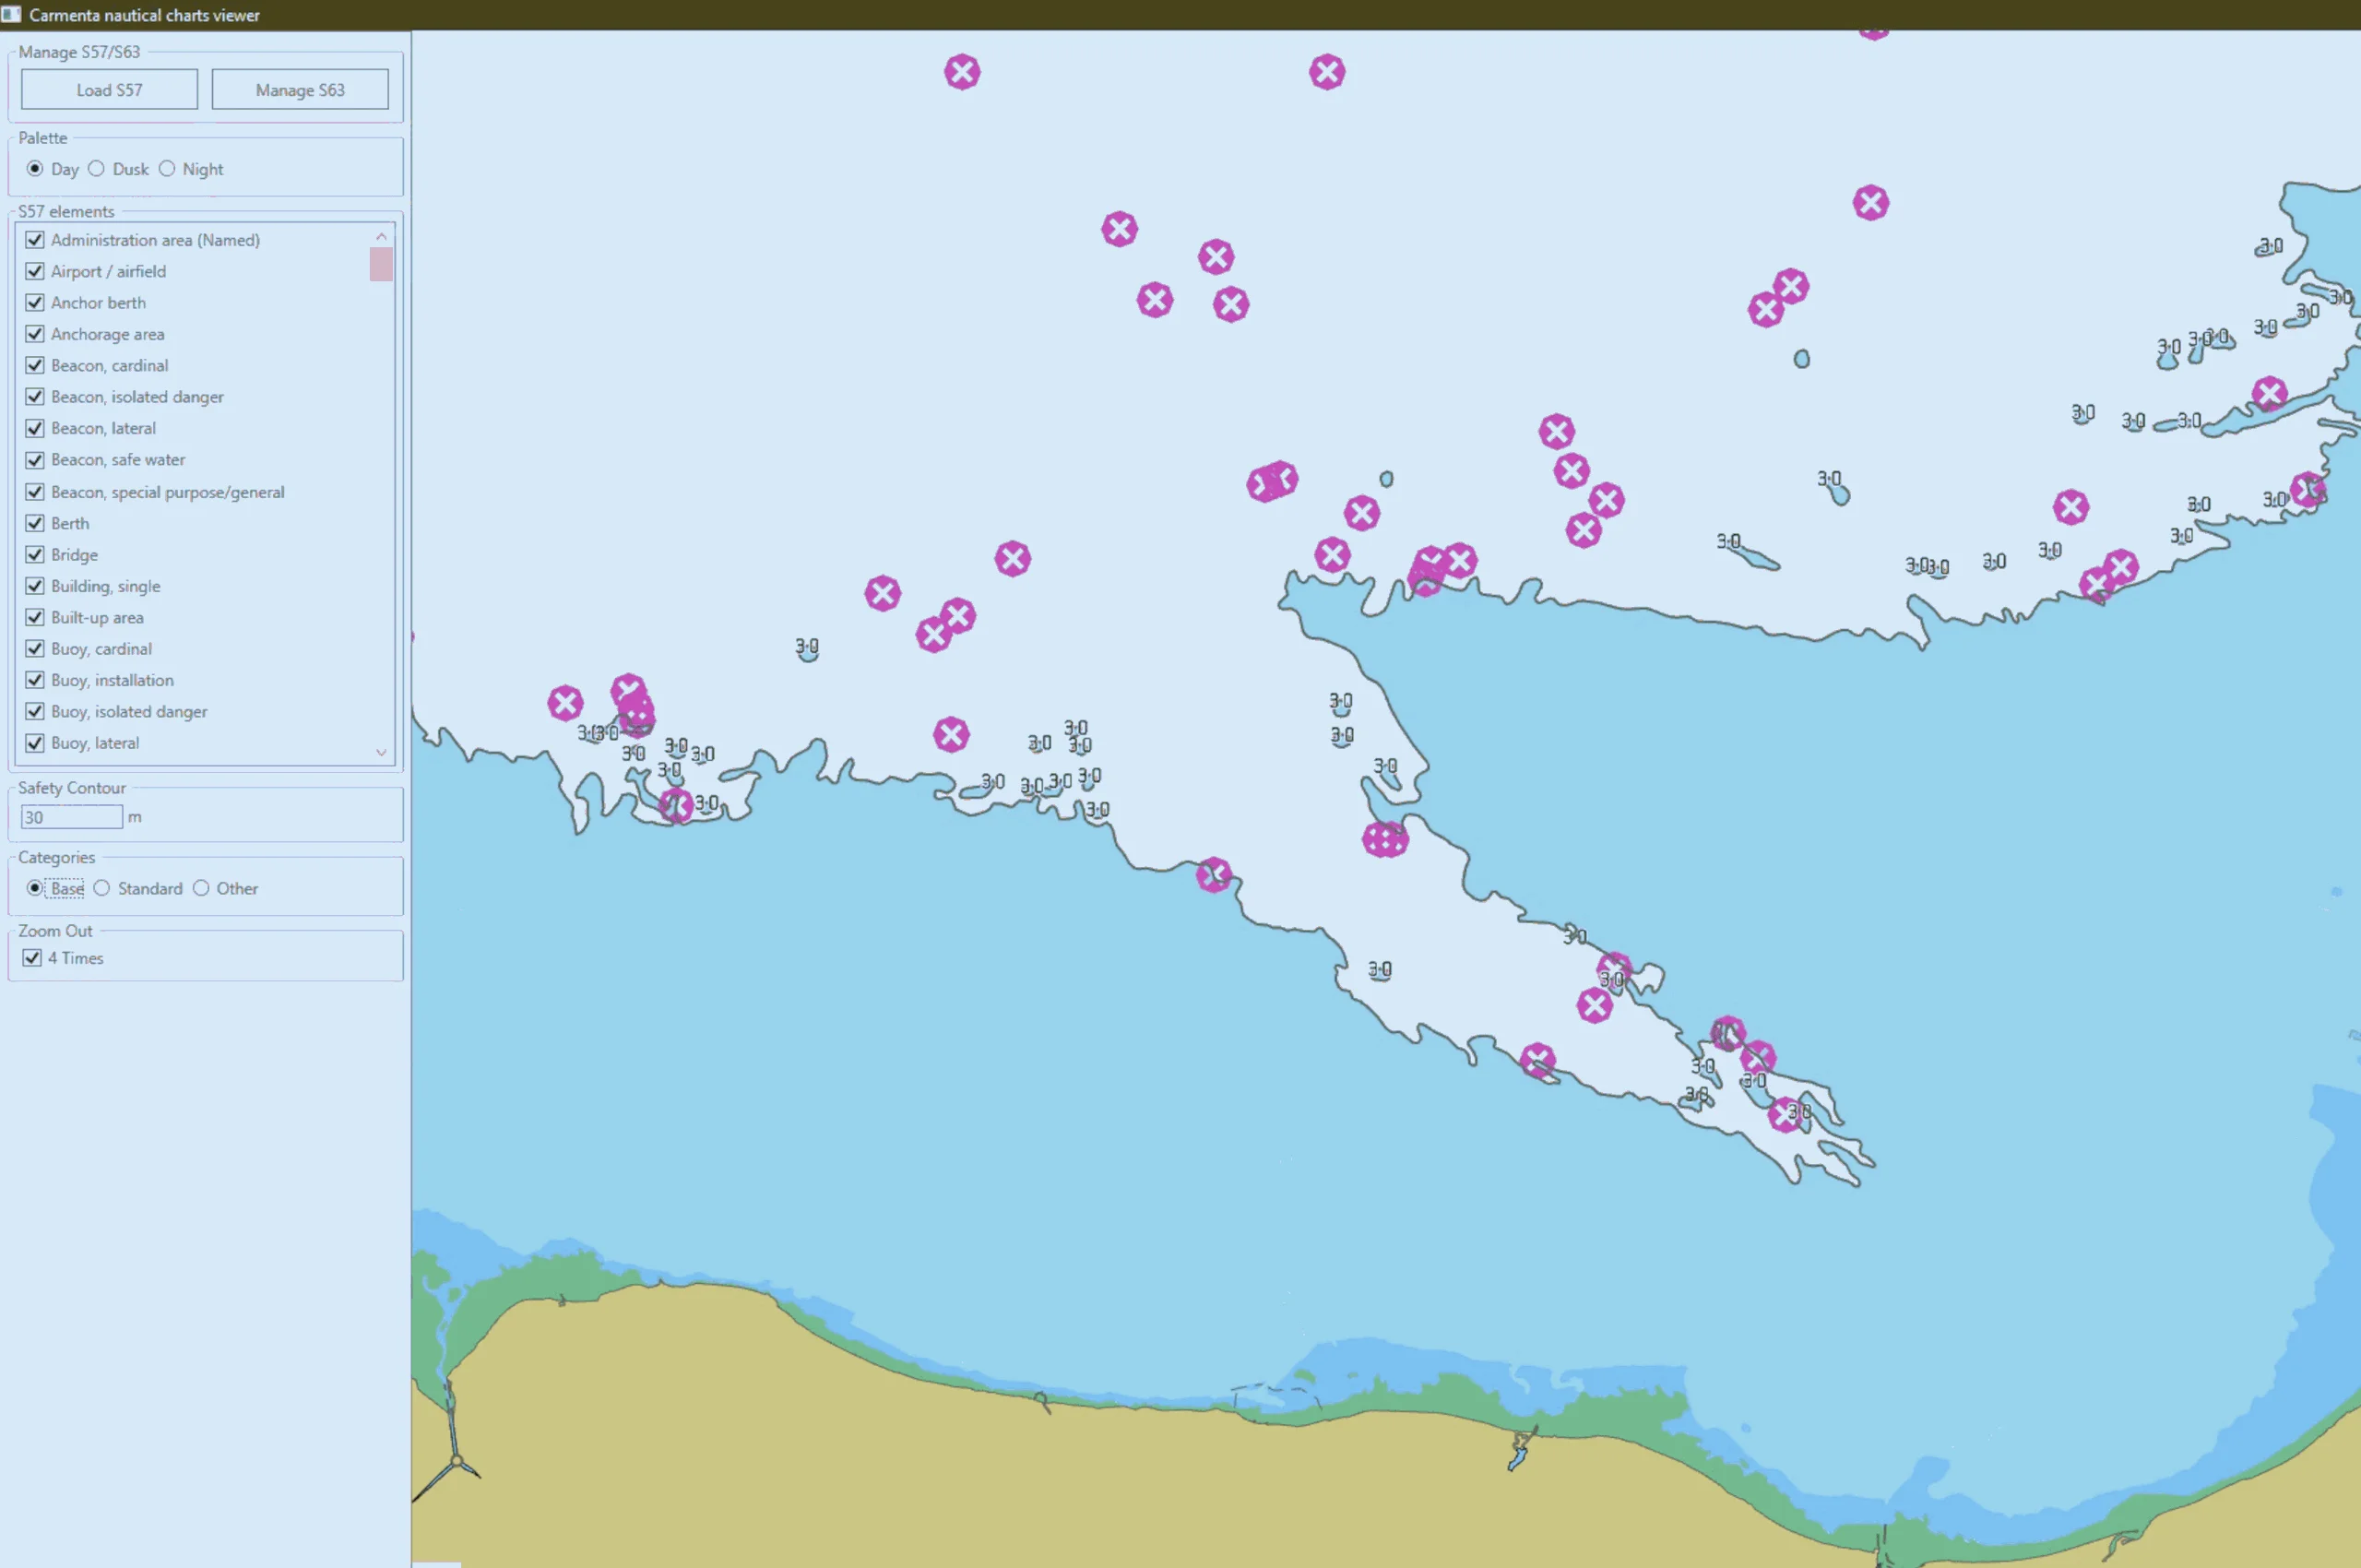
Learn how to set up S-63 encrypted nautical charts in Carmenta Engine. Step-by-step guide covering user permits, database creation, and visualization.
View Post